Switching out your old outdoor light fixtures
 One way to increase the curb appeal of your home and make your home safer is to replace those old light fixtures with a bright, and stylish light. That could be replacing ones by your front door, at the side of an entryway, or a light pole... You can easily do this yourself!
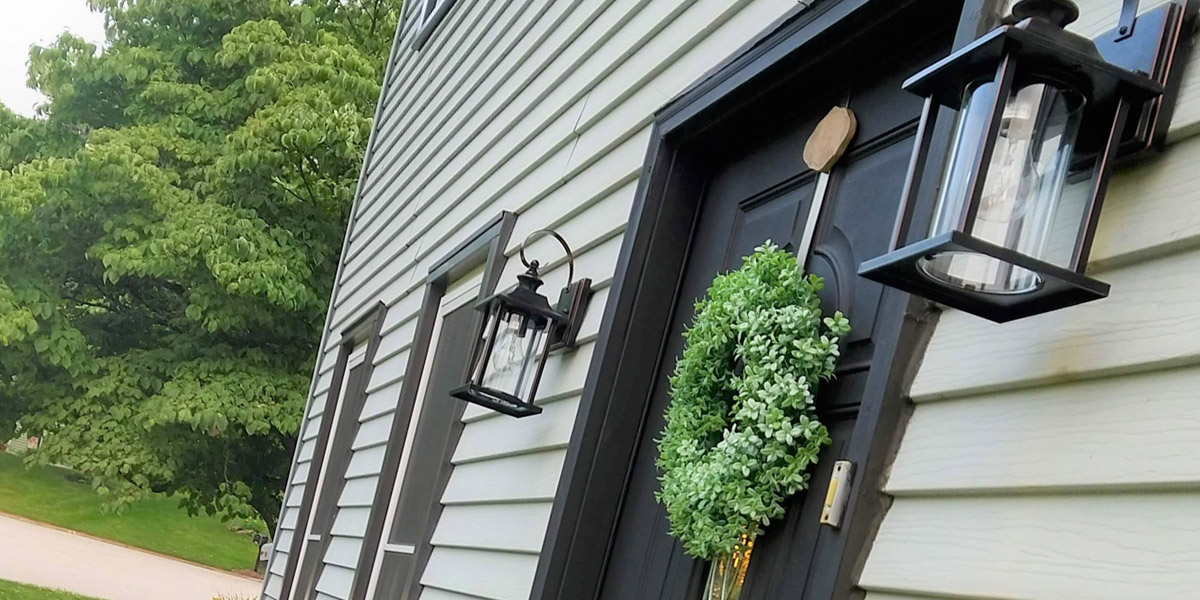
For our home, the pre existing, outdoor light-fixtures we had were literally about to fall off. They were so badly rusted that Peter had to break some of the screws in half in order to get the old fixture down. We actually think they were the originals when the house was built, which was 1976!!! Yikes is right!
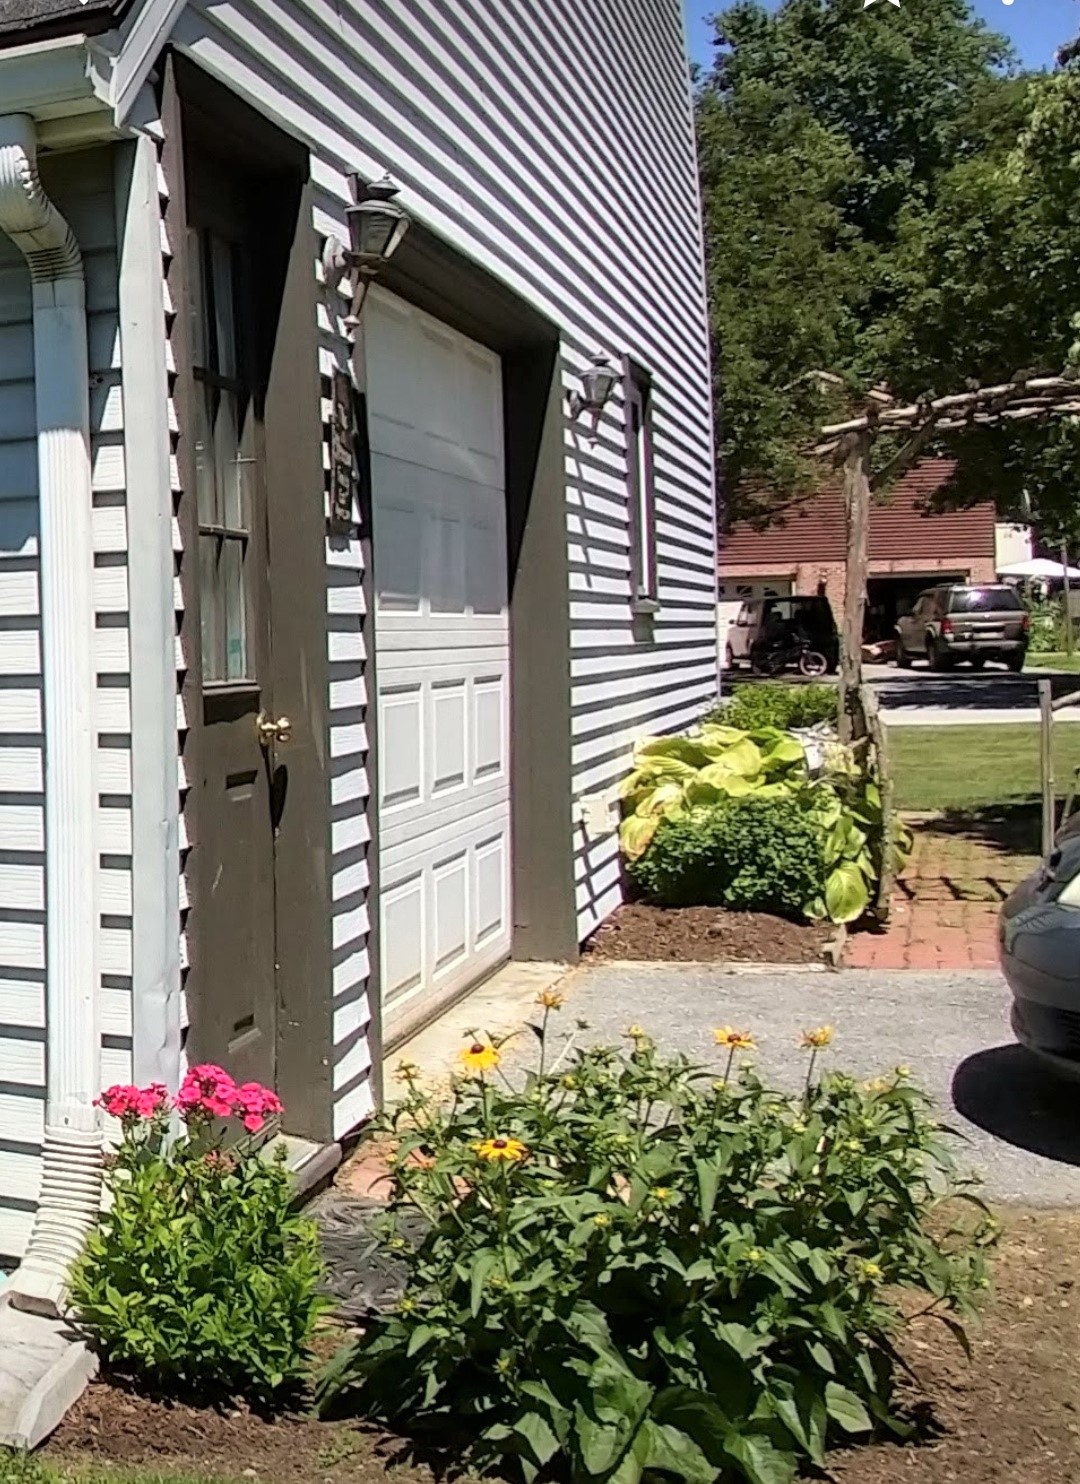 BEFORE
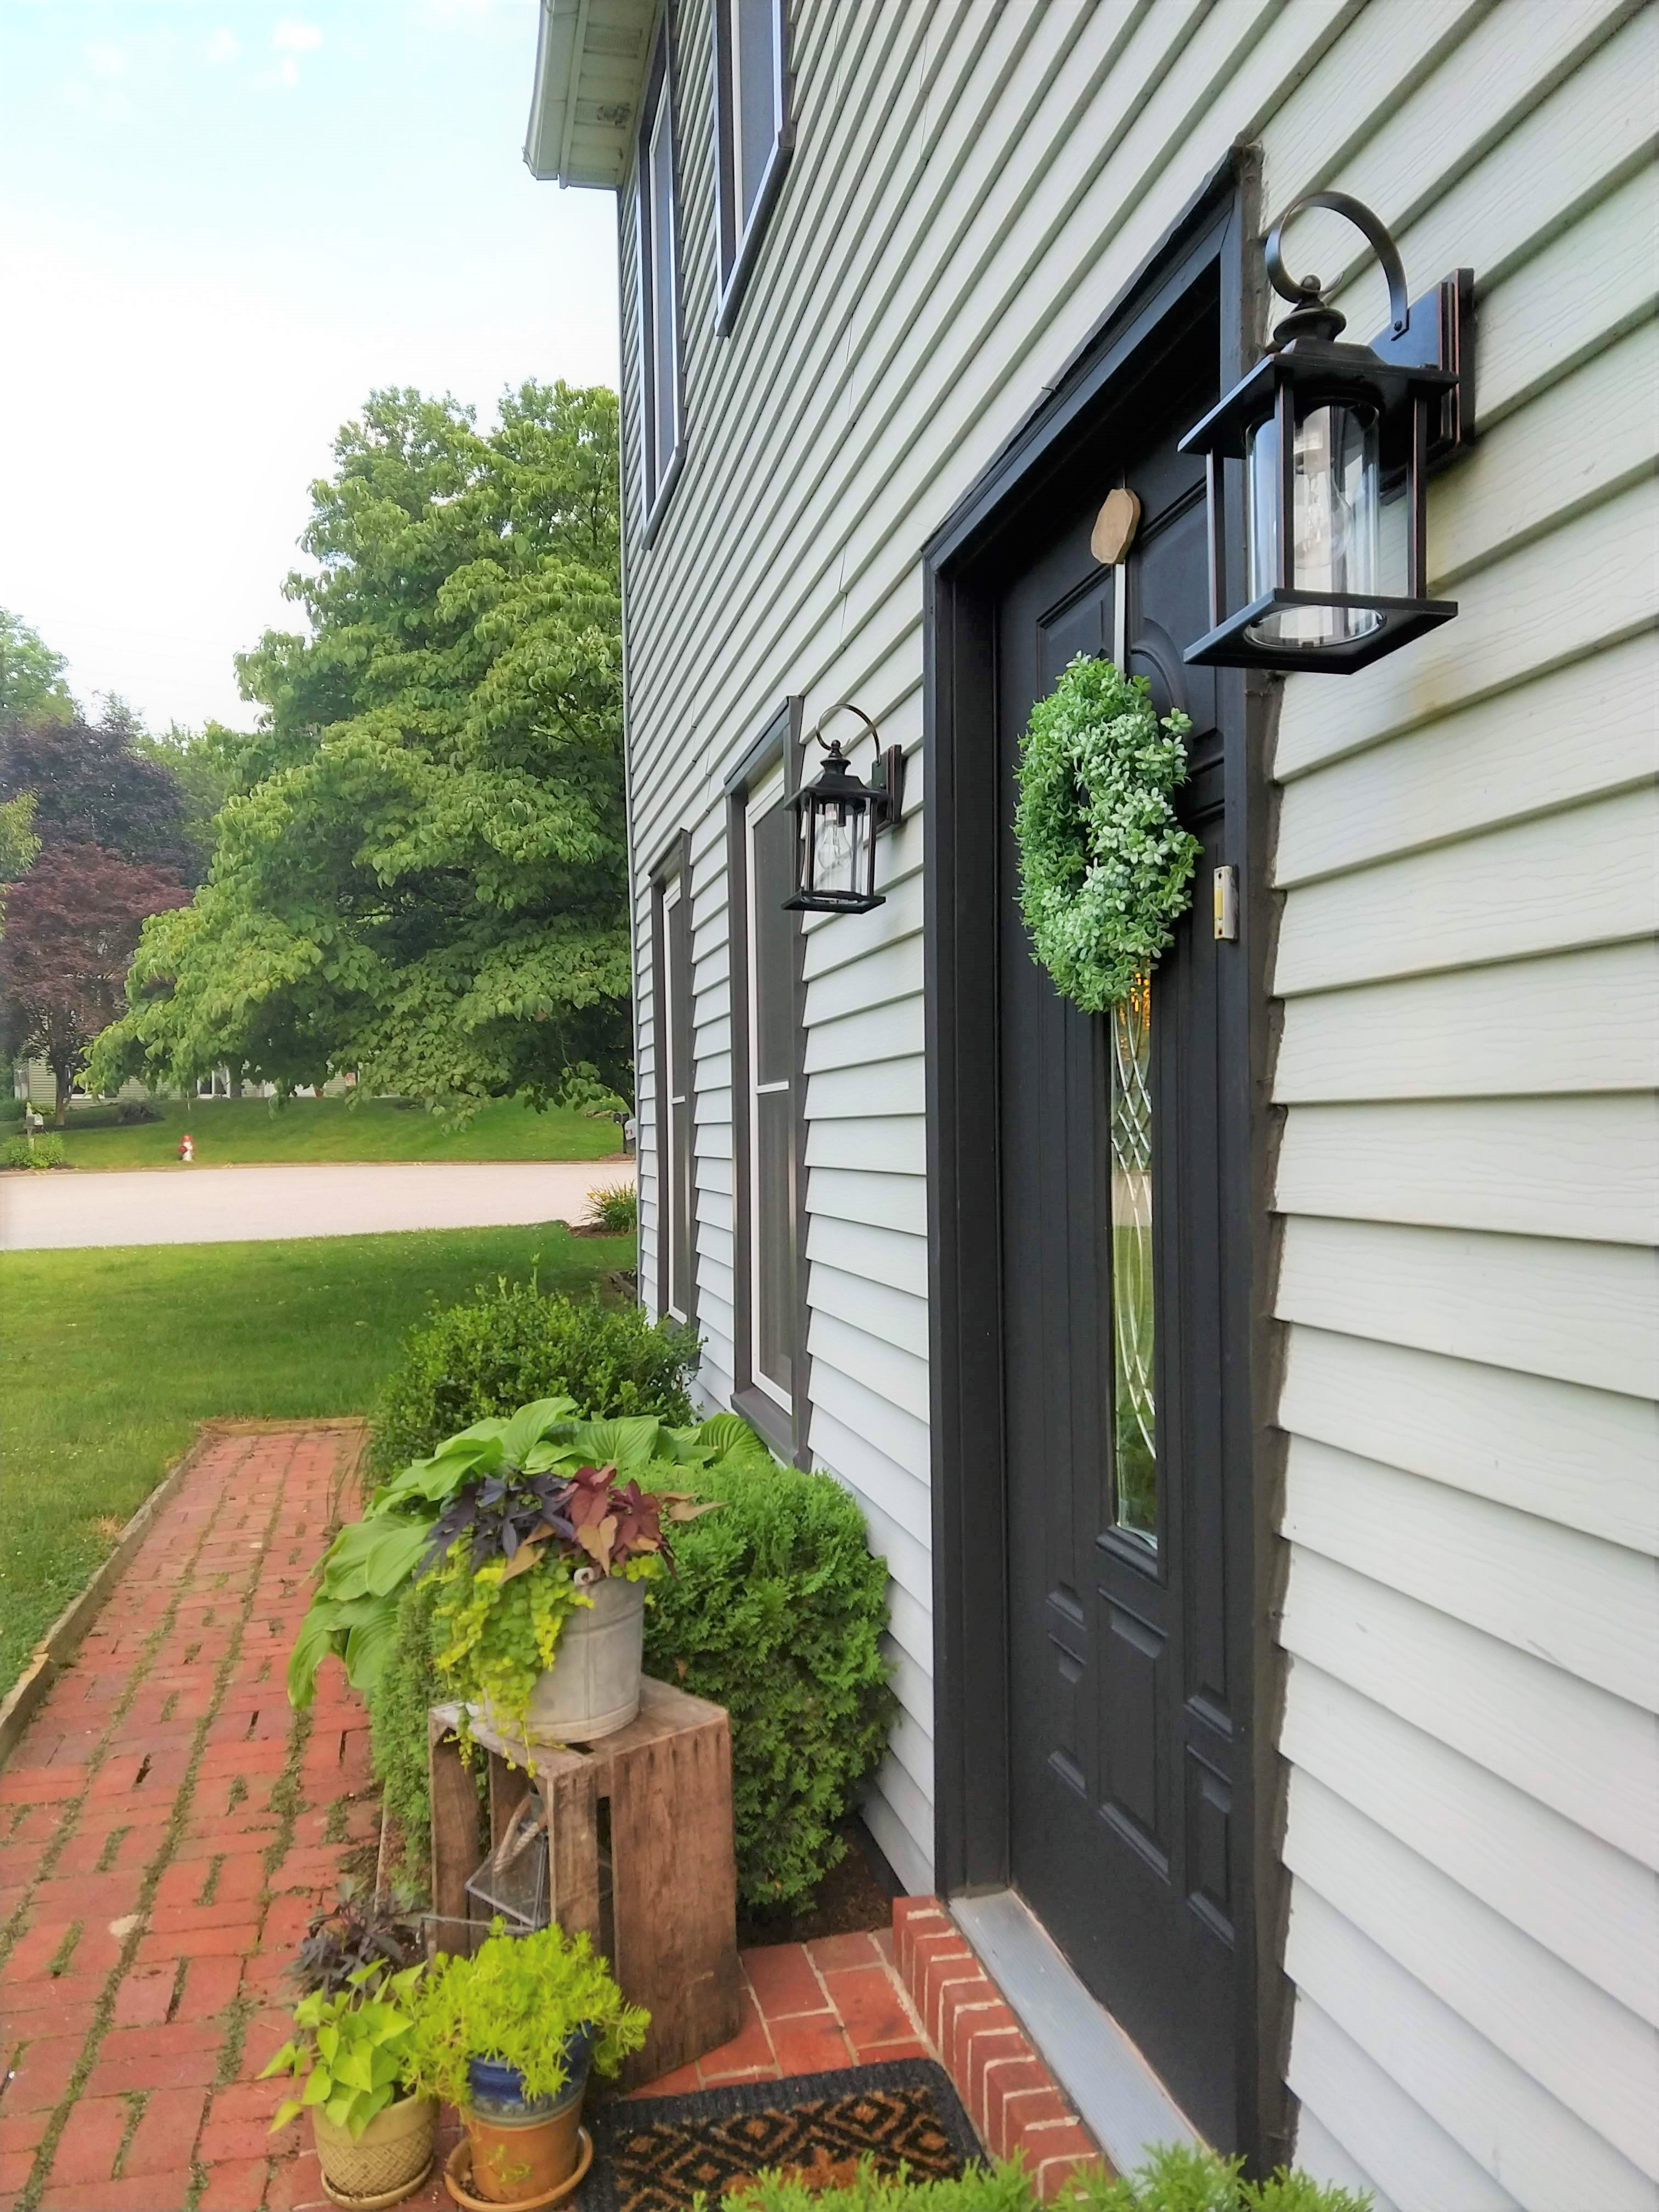 AFTER
AFTERWith Summer starting now, it was time to replace them. We waited and waited because we knew this would be a more costly purchase, being that we needed four lights. We searched and finally found the right fixture to fit our home! We wanted more unique and not the typical "barn light" that's popular right now (nothing against that)! We wanted something easy to clean when needed to, something that was appealing, unique and also being the right color to go along with the house. Thanks to Amazon, we found exactly what we were looking for and it was a twin pack. SCORE!!!!!! So we purchased two, and in the future we will replace the light fixture by our patio door, but that one is still in good shape for now!
P.S. In the picture below I was so excited they arrived a day earlier than expected!!!!!!
I can't believe we bought these lights for really $35.97 each, they are so beautiful and are great quality. I couldn't find anything else with this similar style for less than $40 each, hey it's a $5 difference per light but that still adds up. We are very happy with these lights from Amazon!
Supplies needed:
- Power drill / Screwdriver
- Pliers
- Outdoor light fixture with hardware and instructions (Here is the link to the light fixture we purchased)
- Electrical tape
- Caulk gun (highly recommend)
Installing the light fixture:
- BEFORE removing existing light, turn off the circuit breaker on your service panel.
- Replace mounting bracket -> The new light fixture should come with the mounting hardware.
- Wire the outdoor light -> Included in instructions that come with fixture
- Caulk - used as a precaution for bees building nests, and water entering the home where the hole was.
- Install the new fixture, then light on top of it.
- �Turn electricity back on, and test that it works as expected.
Previously, the fixtures had a 60 watt twist light bulb, they were replaced with NEW 60 watt clear bulbs and they give off a great amount of light for our front porch and walkway, as well as outside our garage. The old were so dim, and didn't give off much light at all, one of our front porch lights wasn't grounded, so we actually had a fire hazard that we didn't realize! But again we haven't touched those lights since my husband first moved in.... so it was time!!!
So sorry for the ugly caulking around the doors, obvs the previous owners didn't care, and just slapped it on there... GRRRRR. In the future we plan to put all new siding, and trim on, but for now we are doing the little things first. :) Happy Summer y'all! And happy outdoor projects!!!
Categories: Adding some spice to your space, light fixtures, exterior, Outdoors, Changing it up, Budget friendly, Decorating, DIY | Posted: 06/29/2019