A converted closet DIY
Our front entry coat closet just needed some TLC, because it was just plain old boring! It had one of those typical white-wire shelfs and that was it...
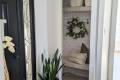
So it was time to bring some life back to this small space!!! A little bit of wallpaper, wood and paint did the trick!
Ps. I could kick myself, I was way too excited to get the wall paper up that we didn't even get a before picture... Oh well, I think you can draw a picture in your head what I'm talking about.
Tools/Supplies needed to build shelf/bench:
- Miter saw
- Drill
- Level
- Tape Measure
- 2 1/2 drywall screws
- 2 1/2 construction screws
- wood putty/scraper
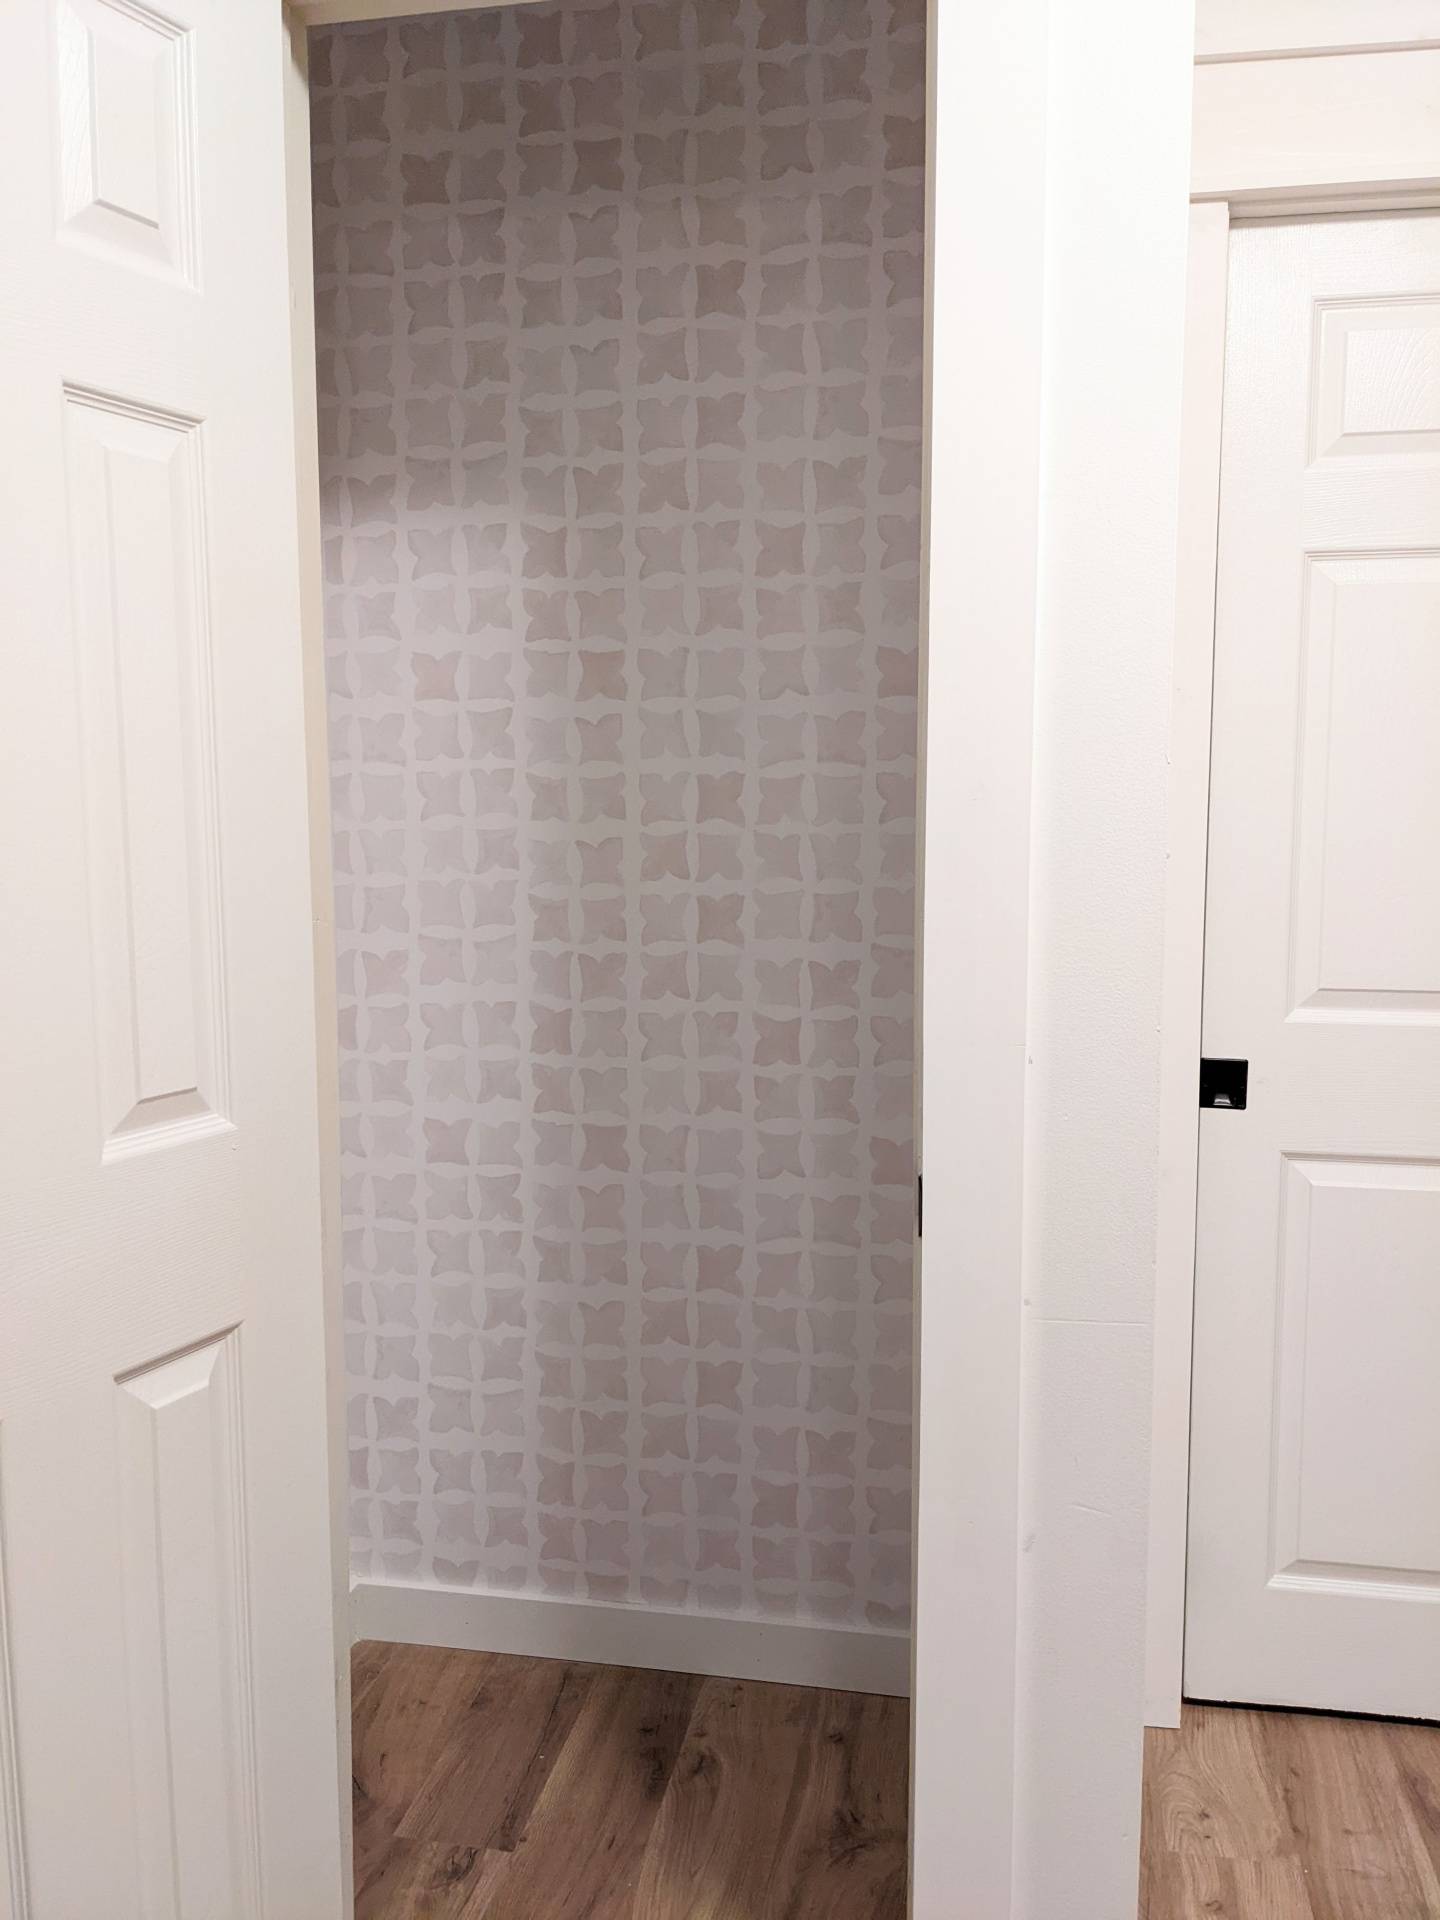
BEFORE:
This is not the true before, but you get the idea! It was previously a coat closet with a wire shelf and enclosed by a door.
First, we applied the wall paper. Then built the frame for the shelf with 2x4 boards, applied top of shelf with another board and finished off with a 1x4 board on the the front to complete a clean look for the shelf.
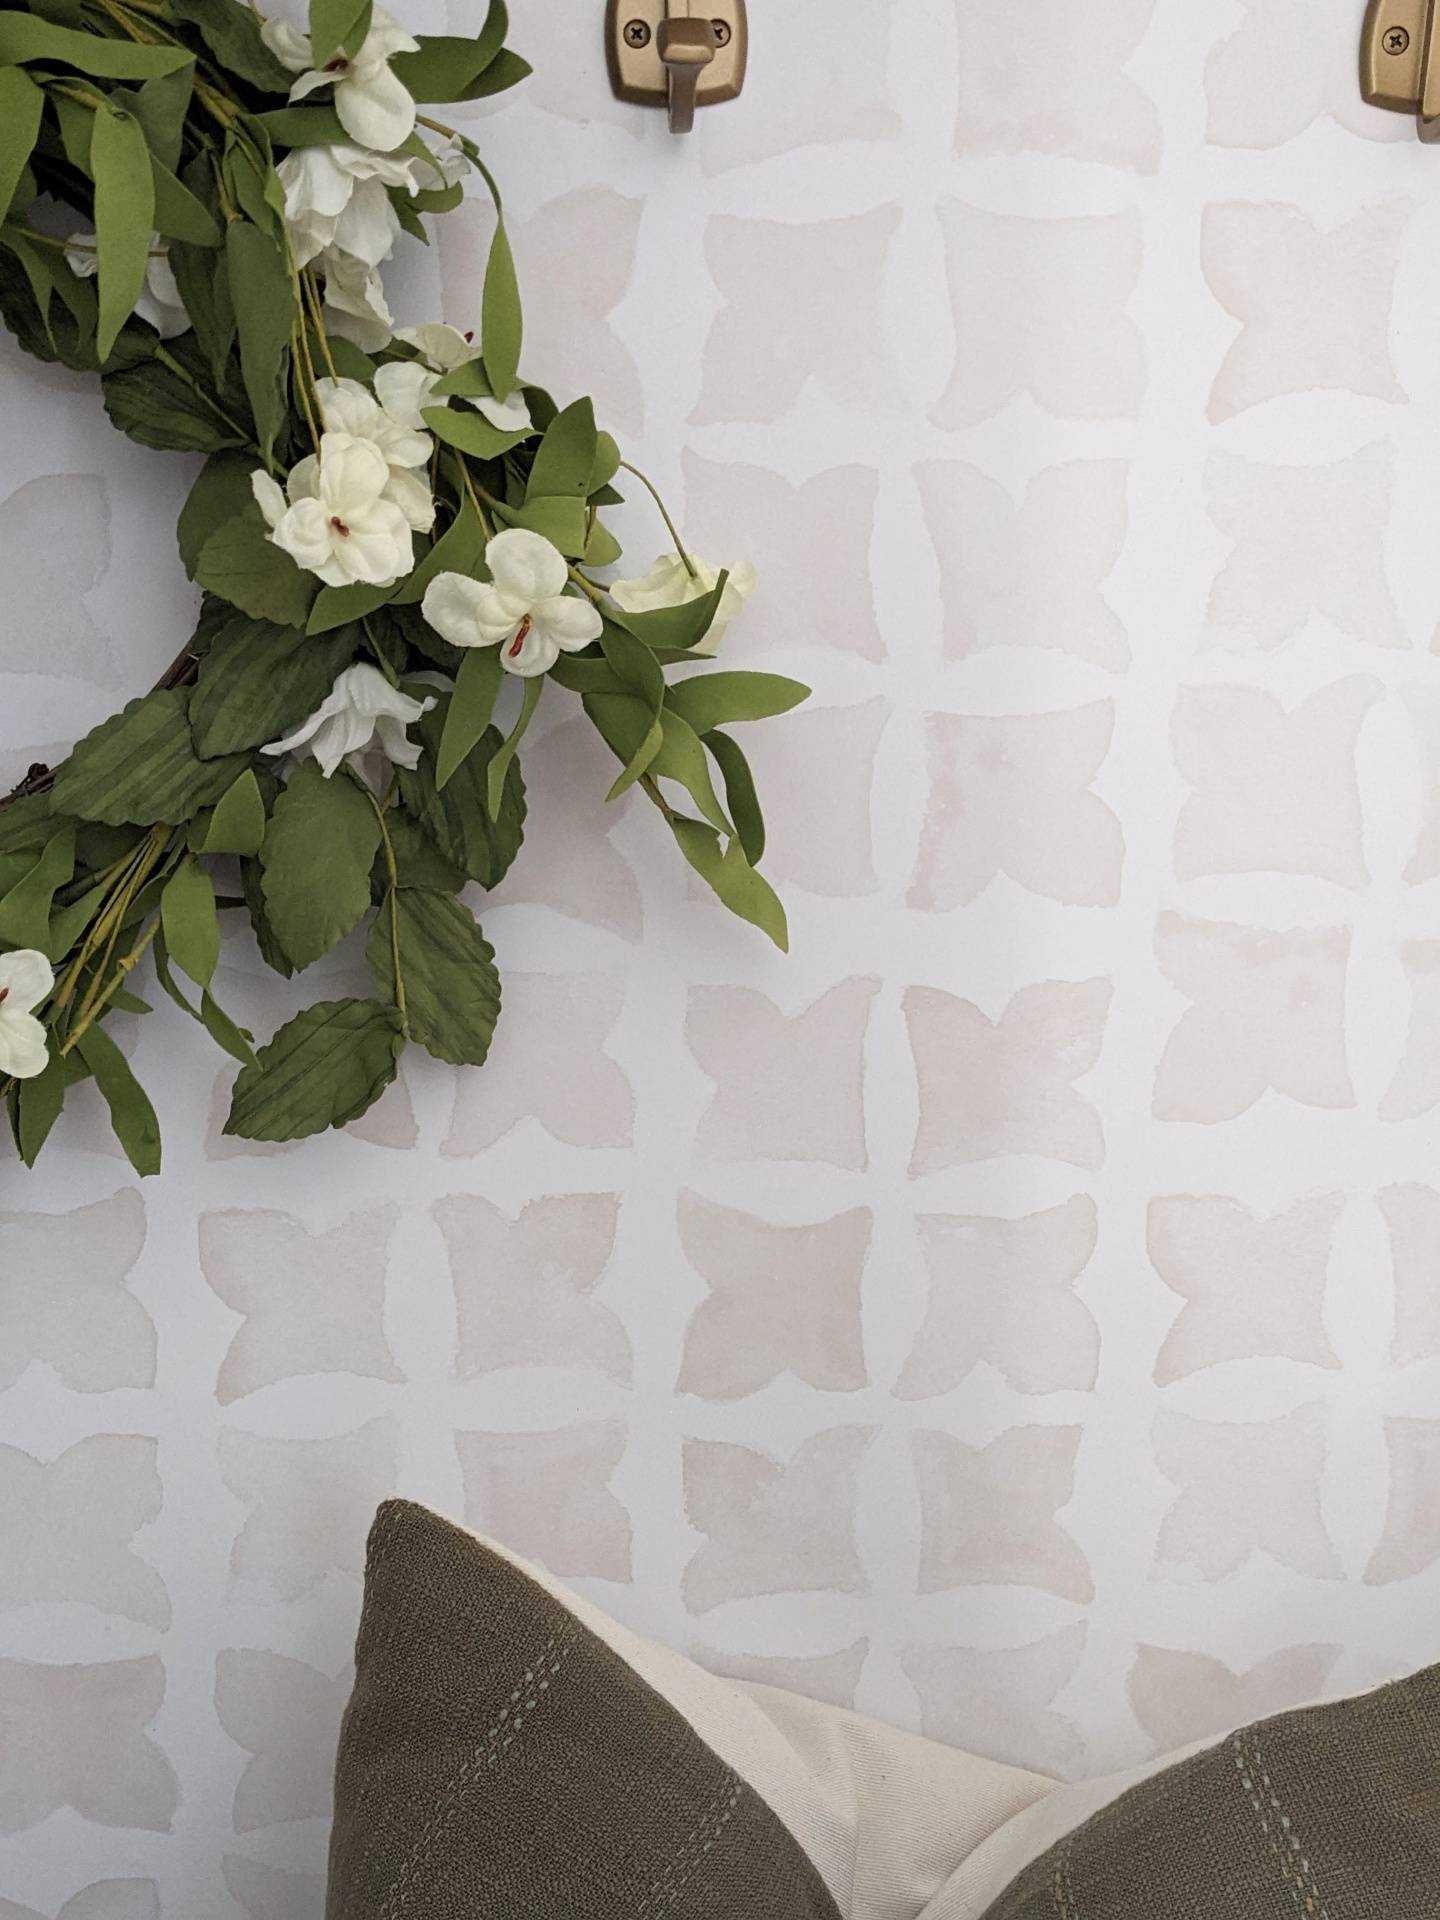
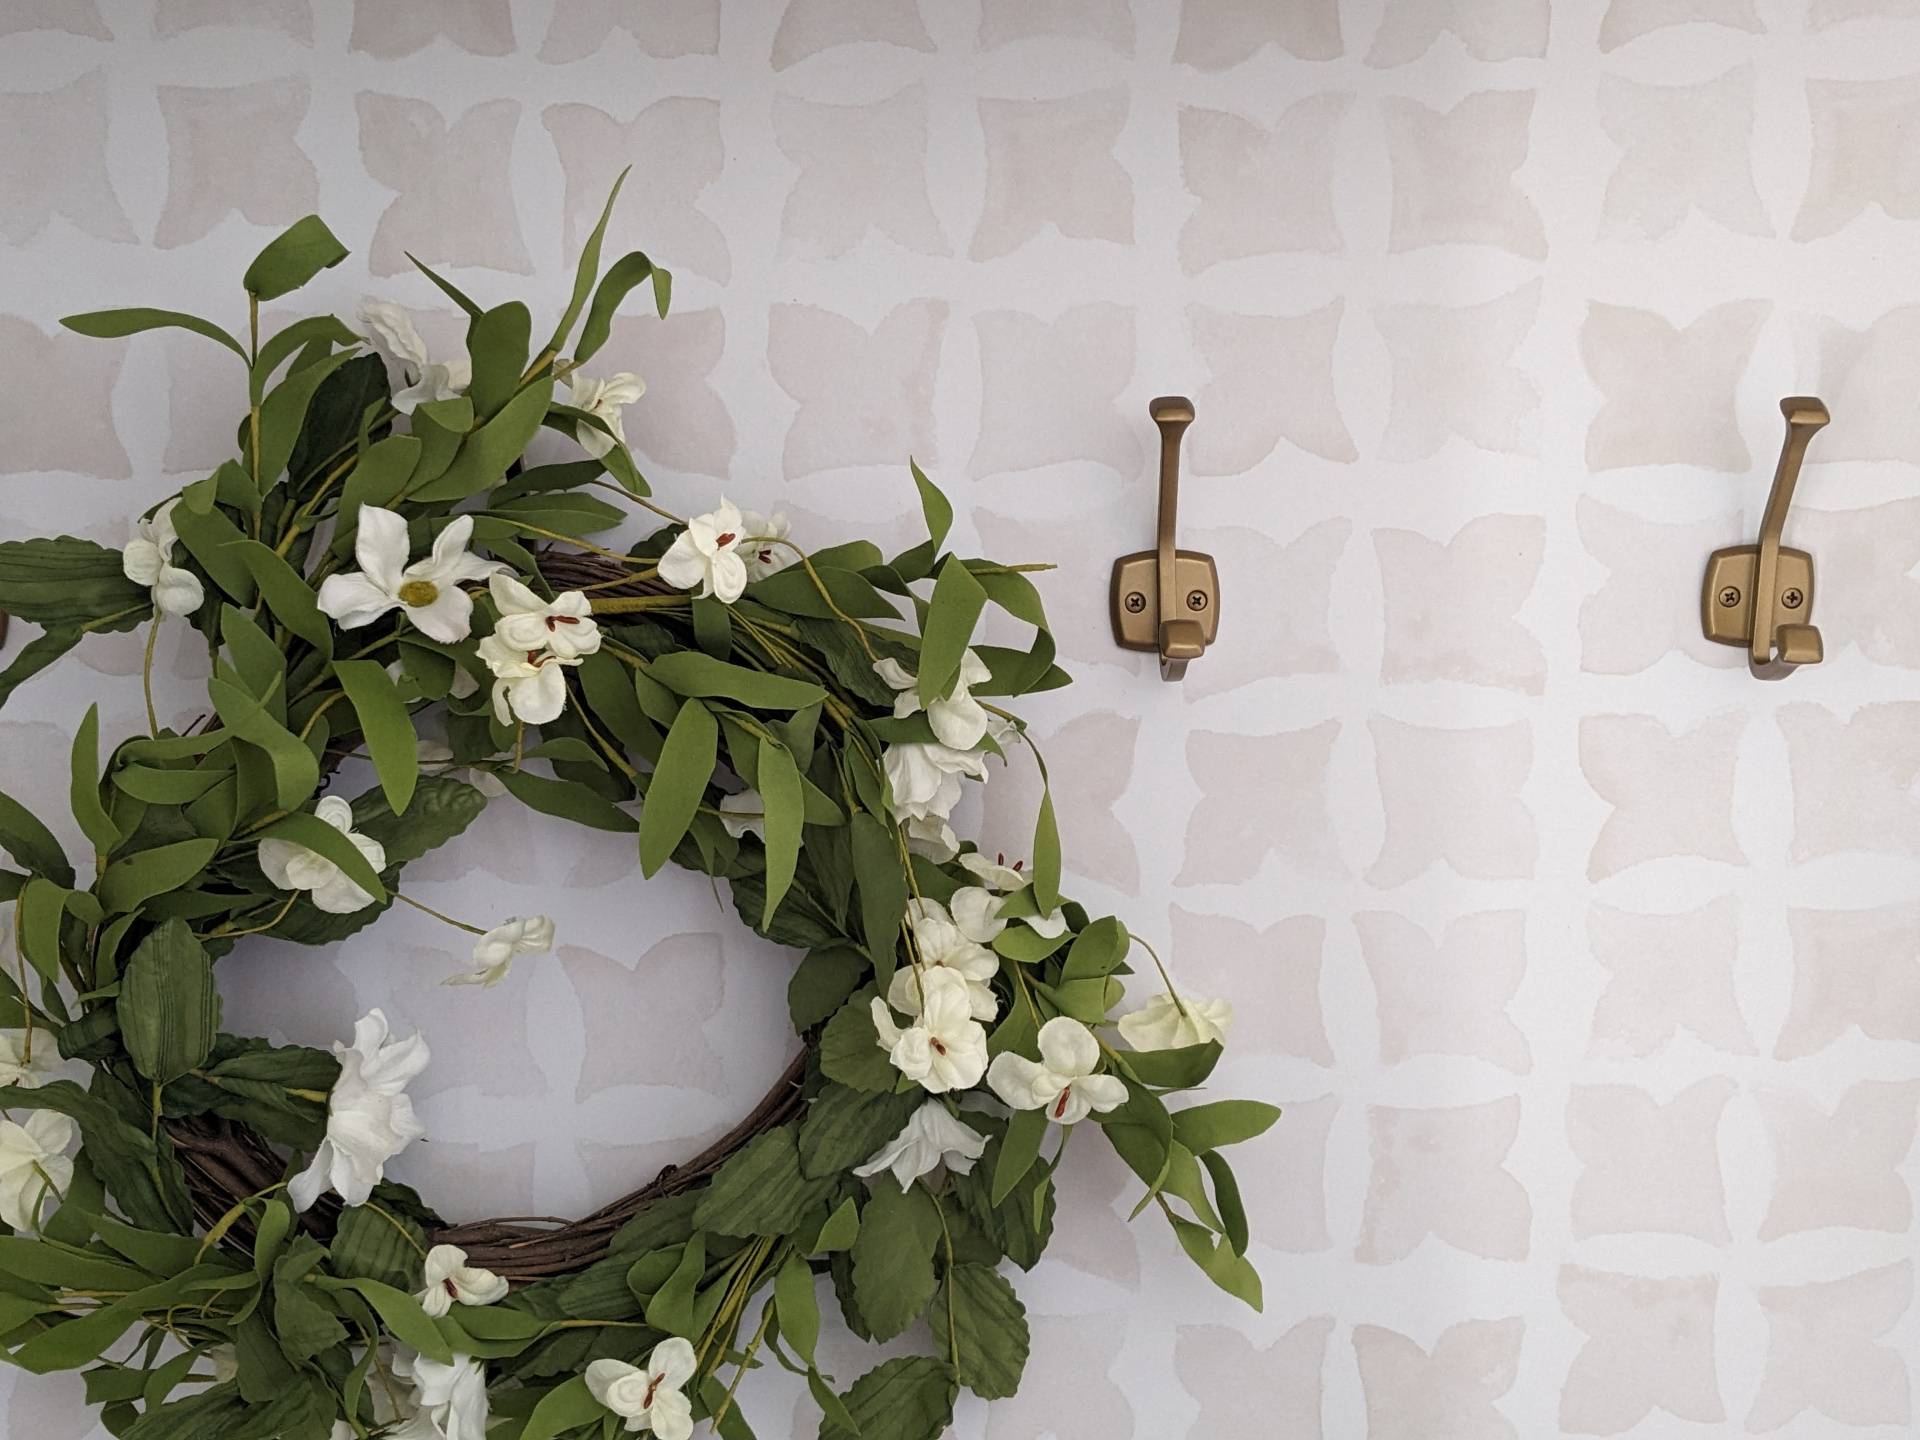
We purchased this peel and stick wall paper from Esty! It was super easy to put on and is even more beautiful in person from what we saw online! It's a simple, clean and neutral design that easily flows with our flooring and bright white walls.
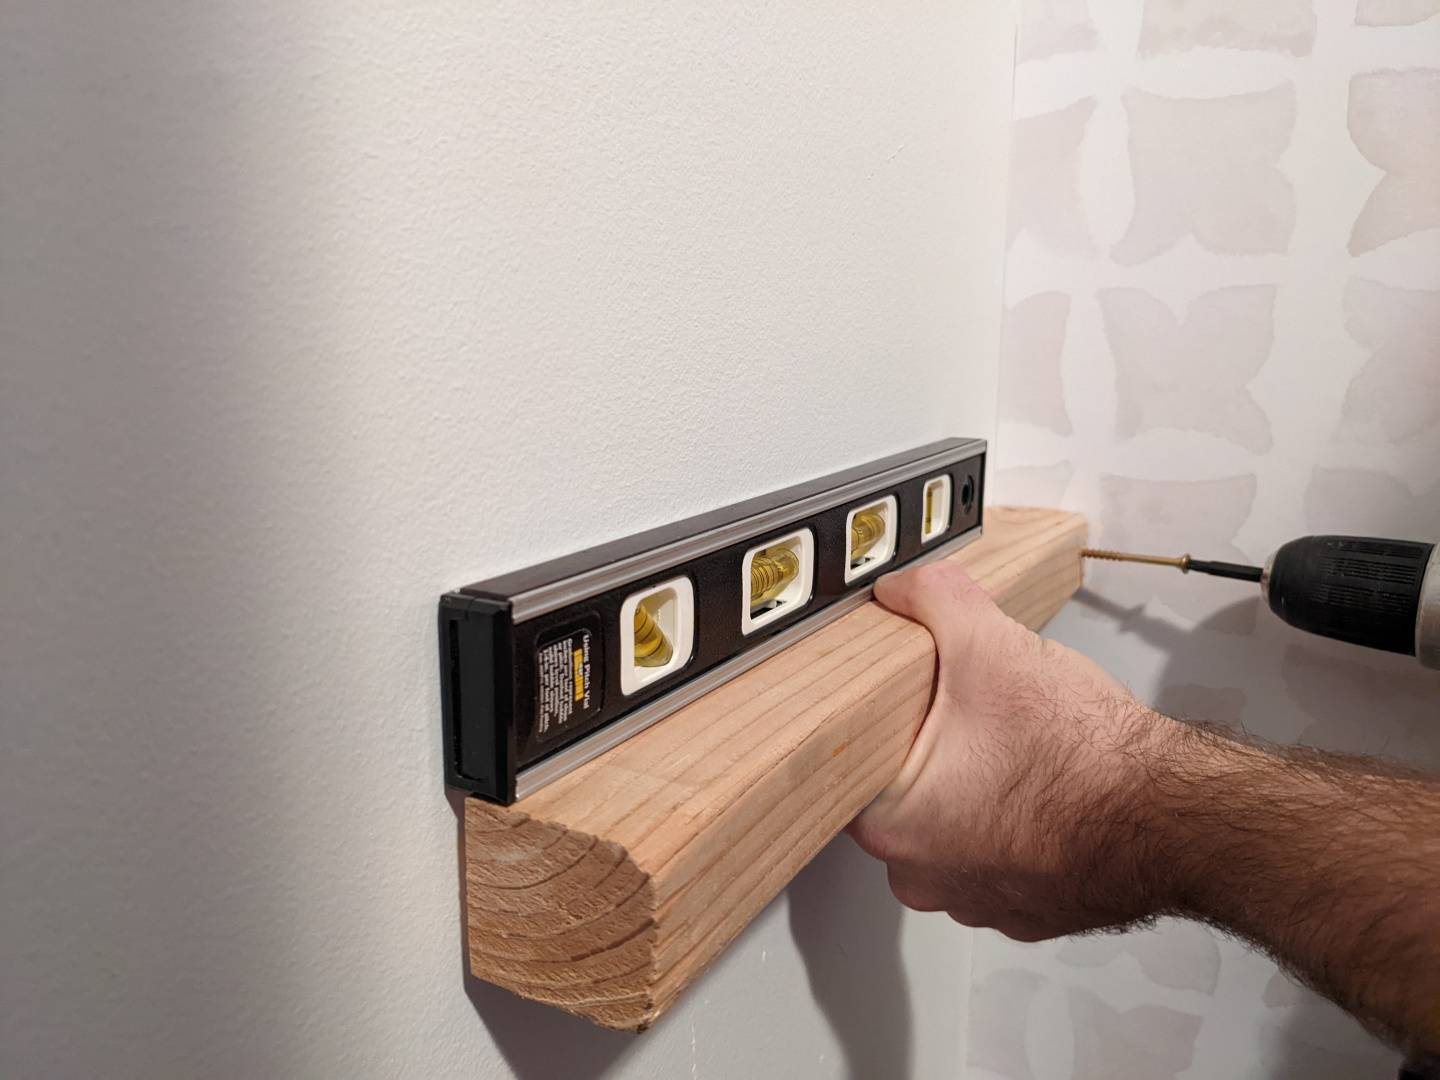
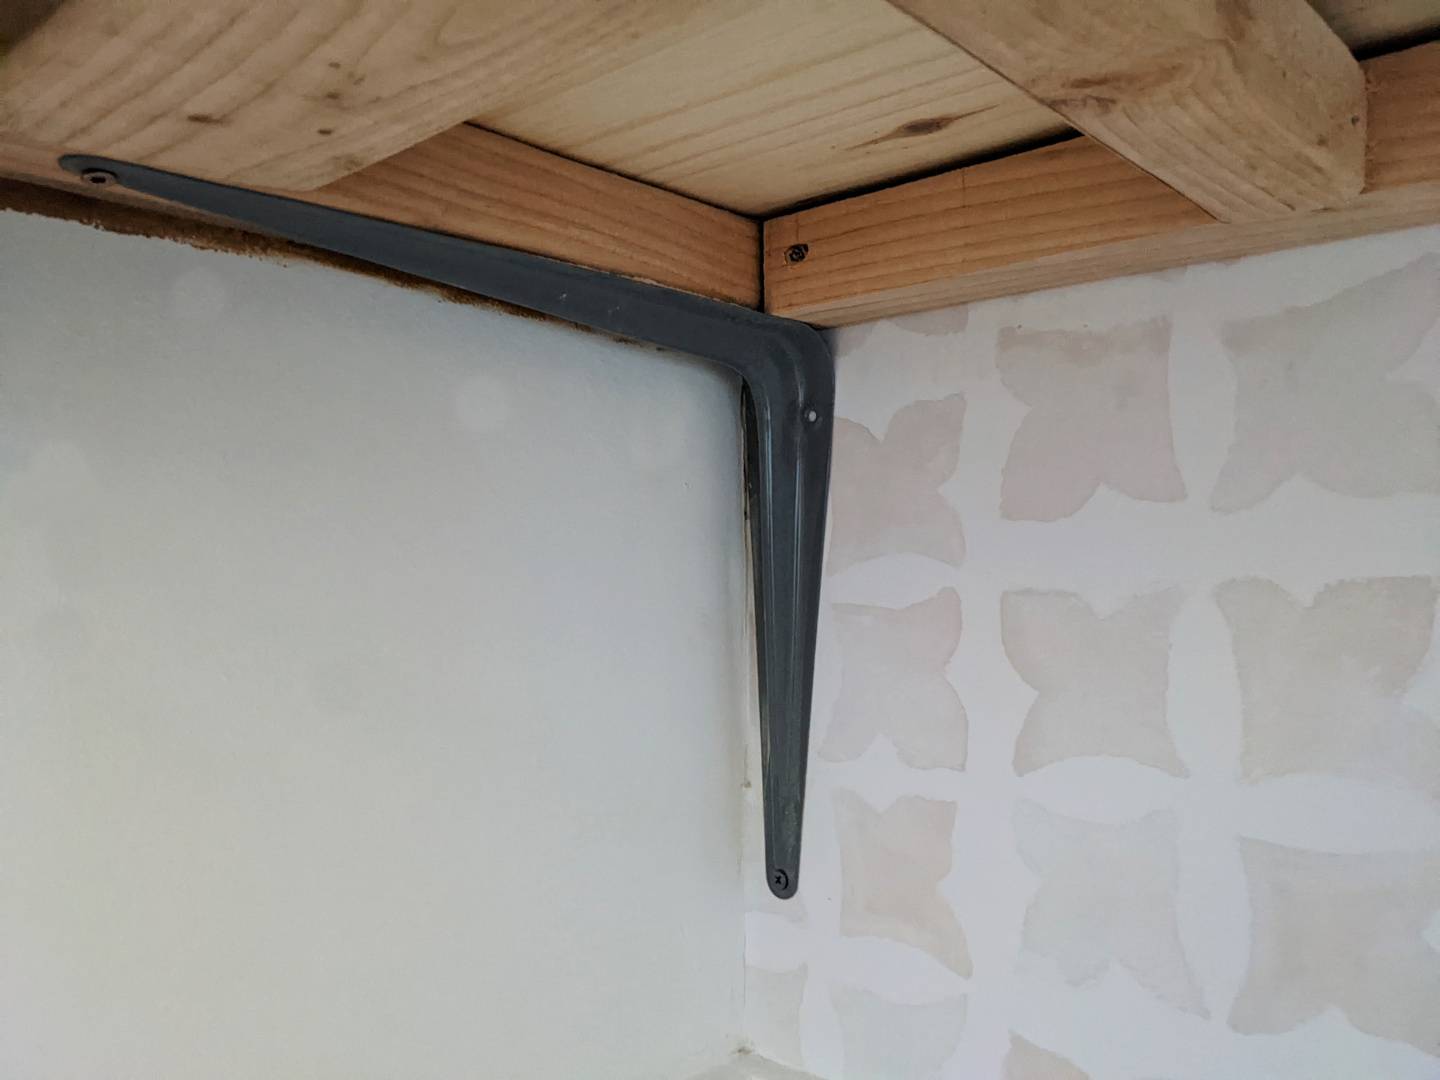
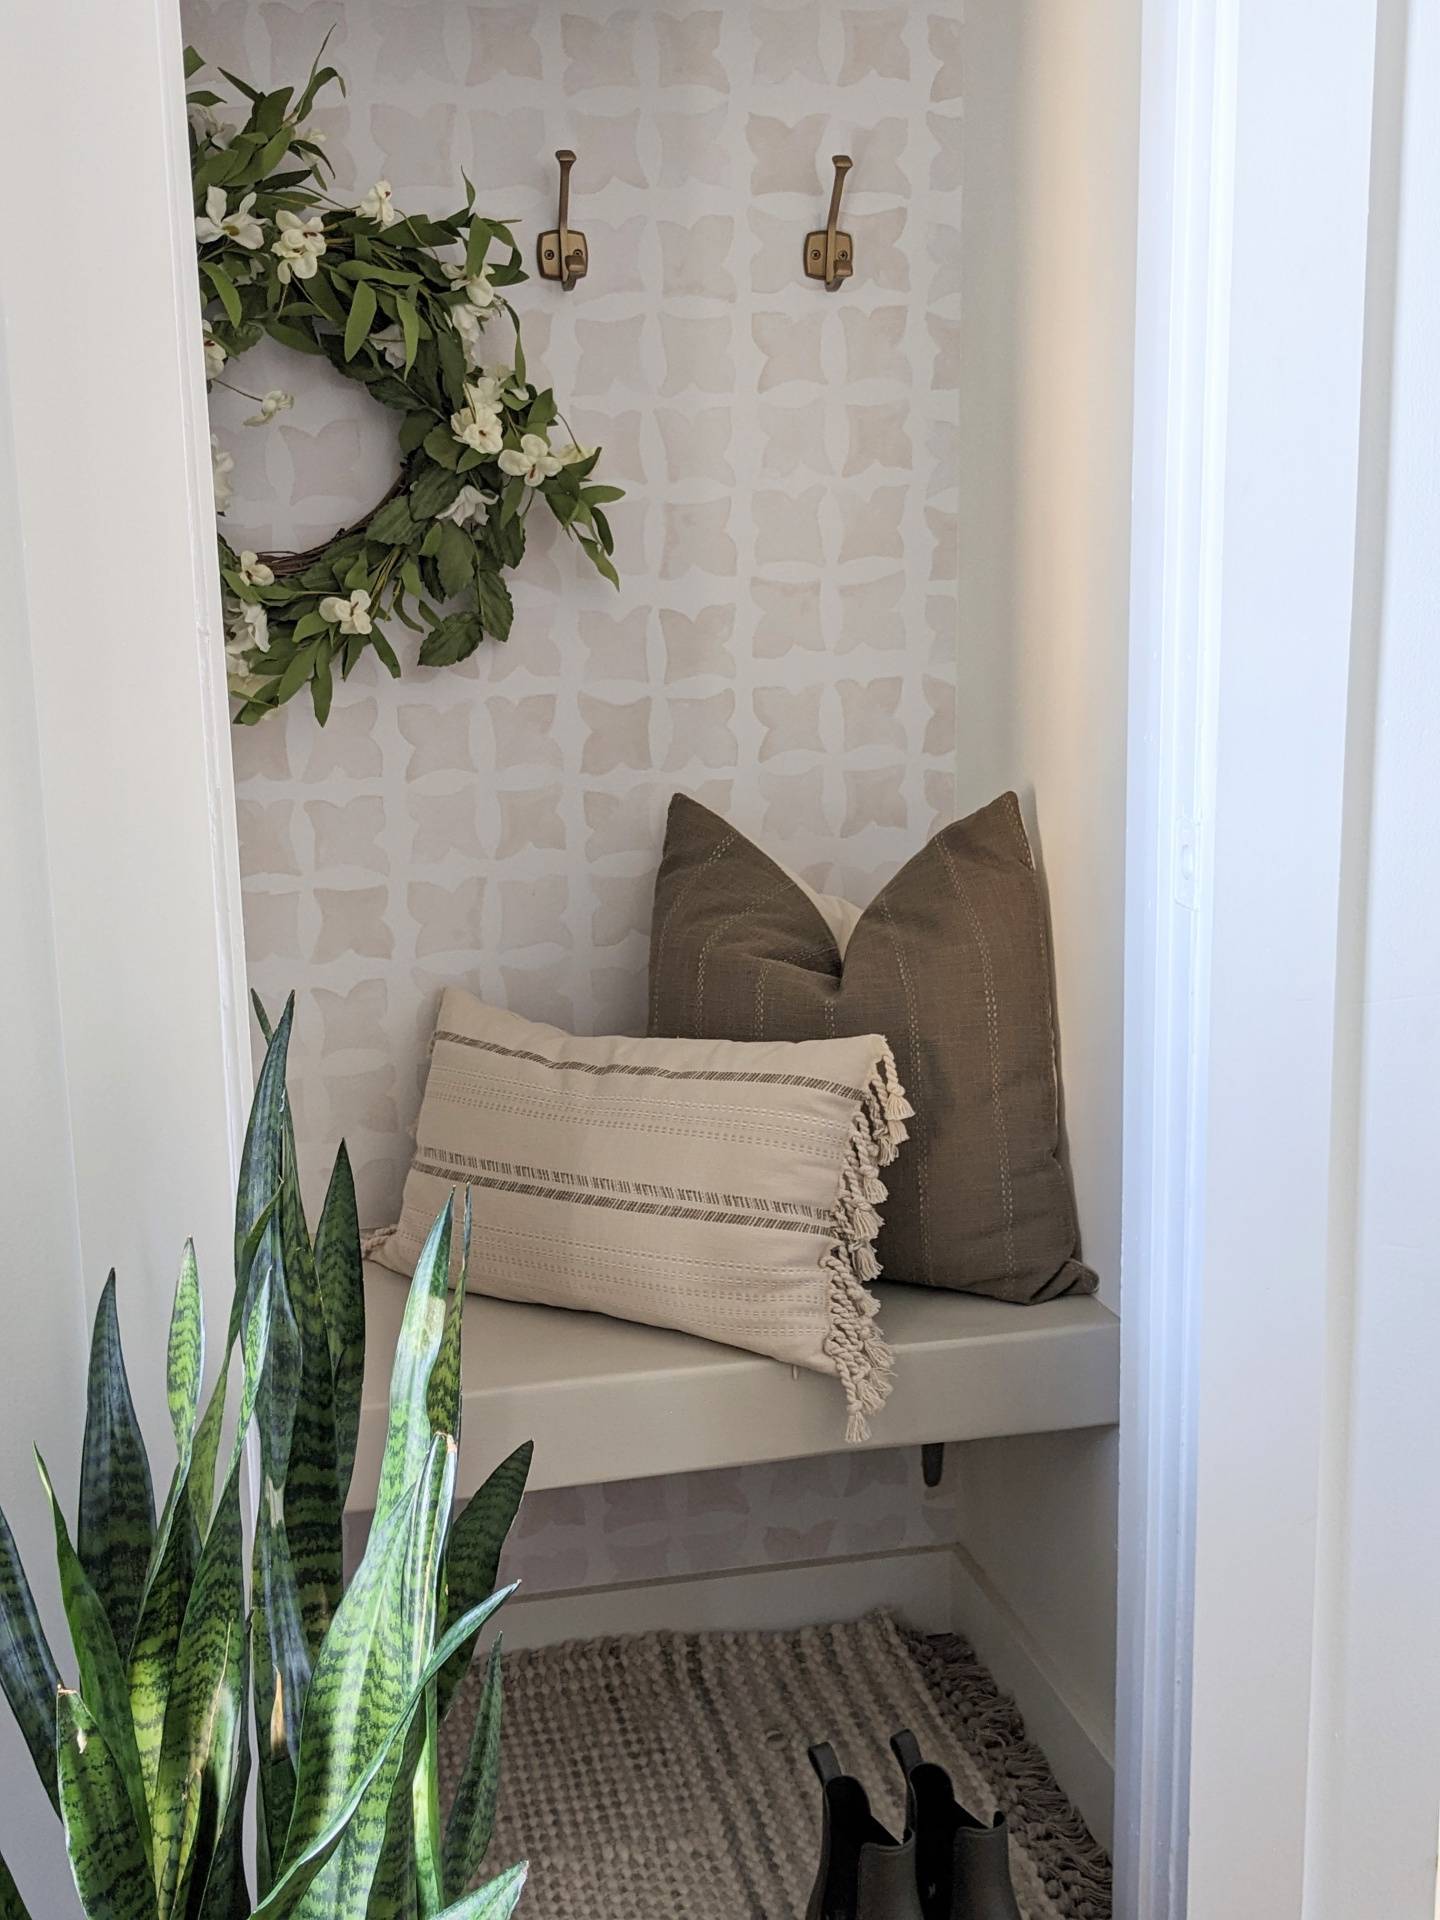
We also built the frame of bench with 2x4's. While we were building the base for the bench we ran into a problem... There were no studs on the side walls, and so we knew there wouldn't be the strength needed to support items, or sitting, or even just in general the weight of the shelf itself being solid wood. So we had to get a little creative!

We purchased shelf brackets to add more durability under the existing base of the bench. After everything was built and in place next thing was caulking and applying wood putty as needed, prior to staining!
Long story short we had a test piece that we used for stain colors in which we thought we liked each one, but once the color was applied to the shelf/bench we did not like how it looked in the space. So fast forward 5x sanding off the stain colors ..

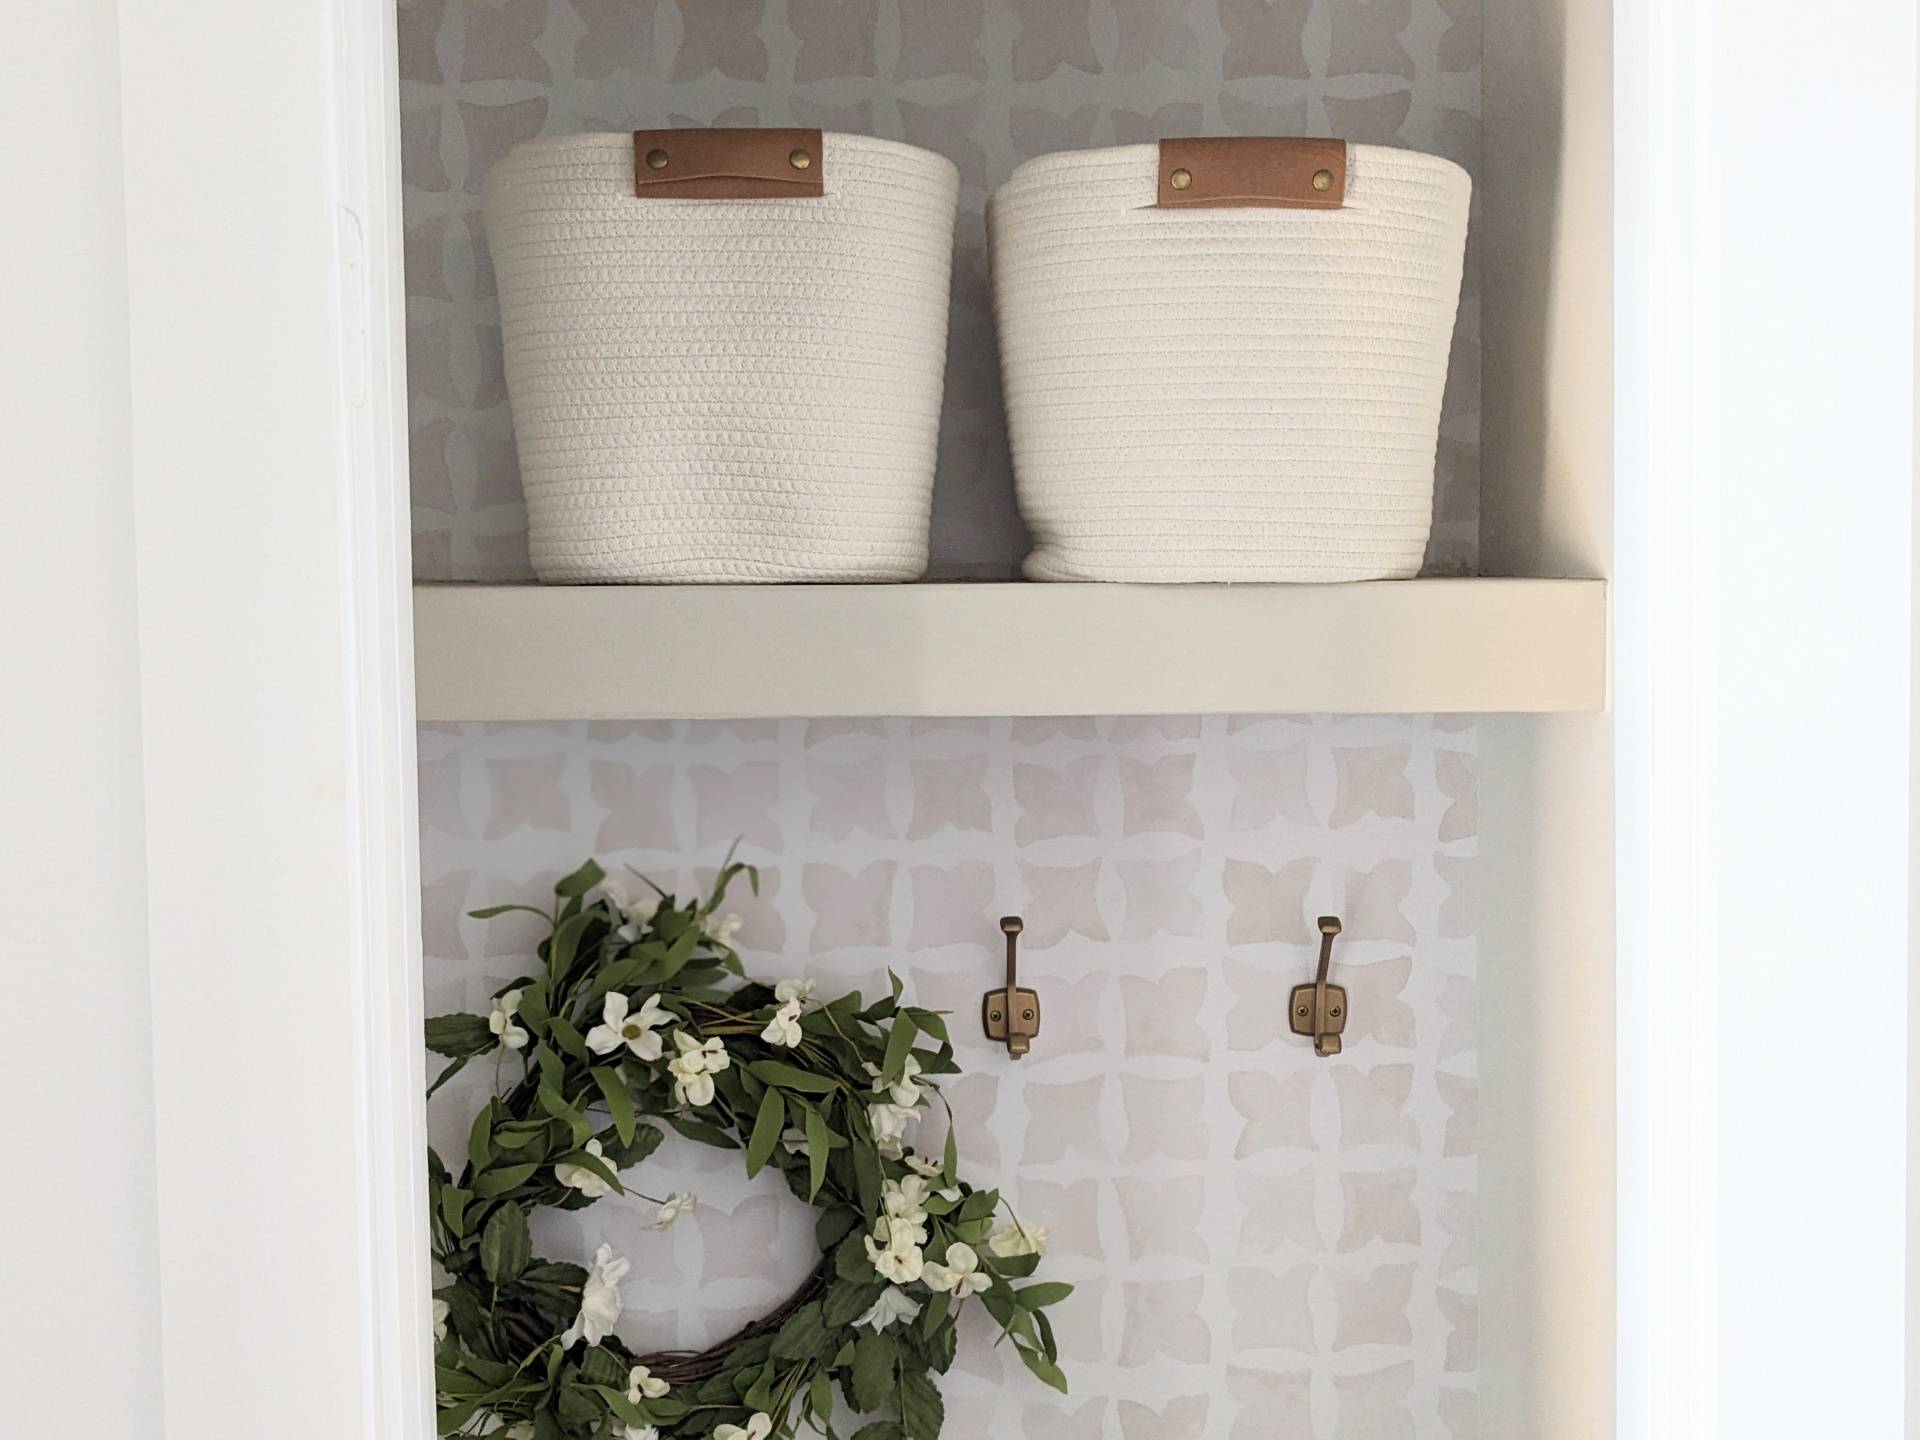
We ended up painting the shelf and bench the same color (Accessible Beige by SW) as our beadboard wall across from the closet.
A project that should have taken a day, and ended up taking a little over a month was totally worth it. With lots of trial and error in the process, we love the end result!!! This space serves a lot of use but also is really pretty!


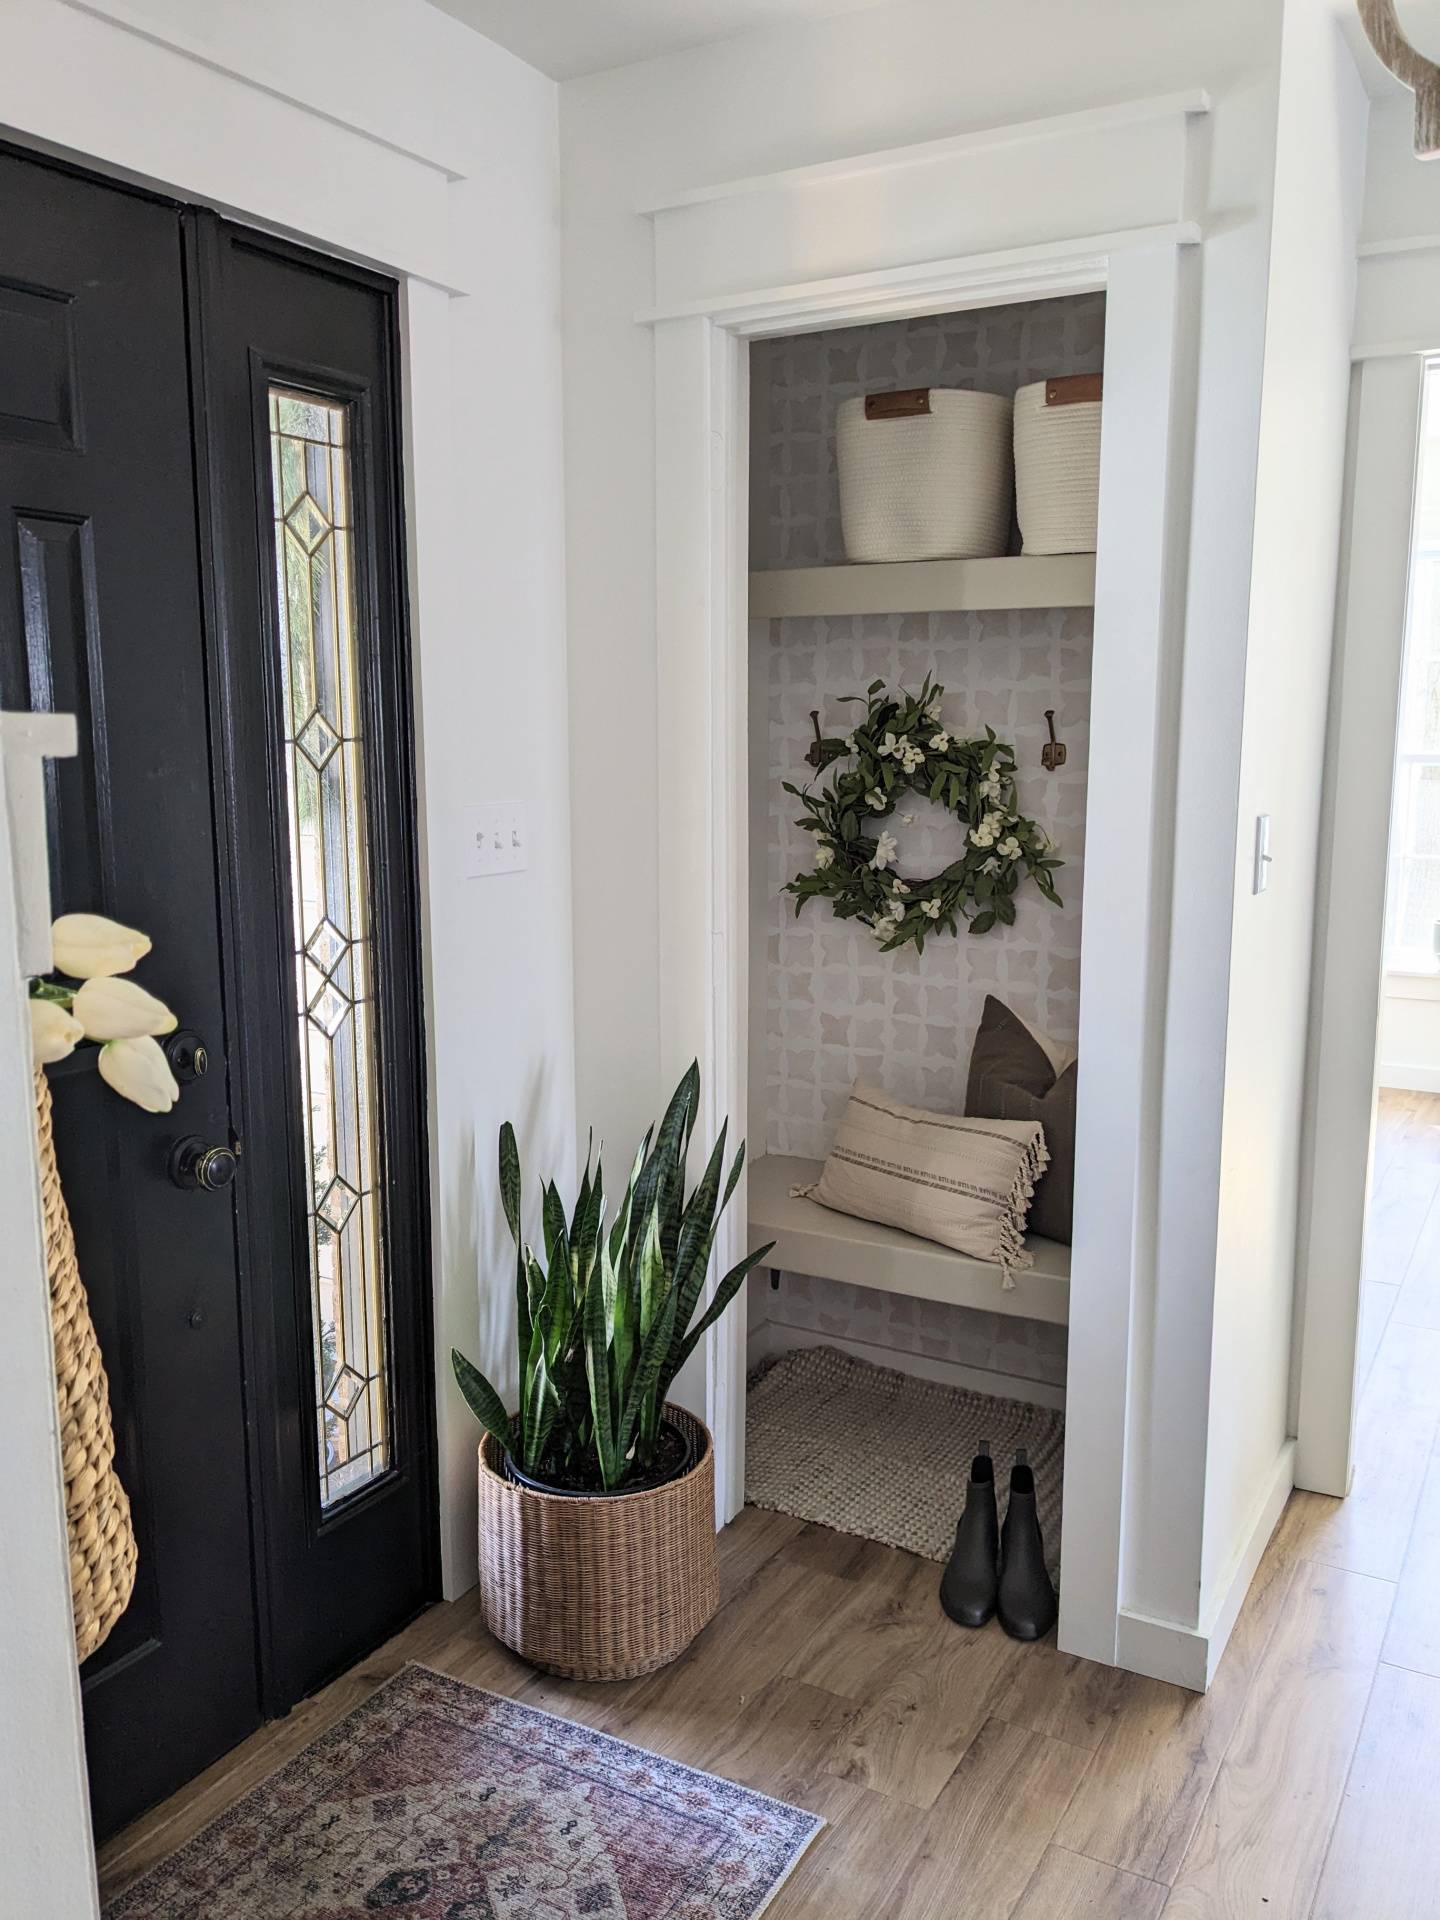


Though this was a little bit of a tricky project, it is done and it has been a big impact for our entryway area. Lots of guests have commented how practical and pretty it is, and that surely has been the case for us.
There are so many little DIY's we can do to totally transform a space into something useful, pretty and more inviting. Not everything has to be a total demo!
Posted: 12/18/2021
-400x400.jpg?_t=1701554384)