A Master Bedroom transformation!
I think it's time. After 2 years of being in this house and having furniture for a few years now. Plus I mean we just moved our whole bedroom suit down to our Airbnb so now we really have to whip our bedroom into shape! Our bedroom is pretty spacious (which I love so much) and we both knew we wanted to add some fun things to the space to make it extra cozy.
The board and batten wall, all new trim, the DIY electrical fireplace, and the barn door.... We love this space we created, and we are finally all finished to share it all!
Once the Airbnb had opened, we were ready to put a lotta love into the most personal space in our home: The bedroom. I hope you're excited to read this blog!
Let's take a look at where this space began:
The Before:
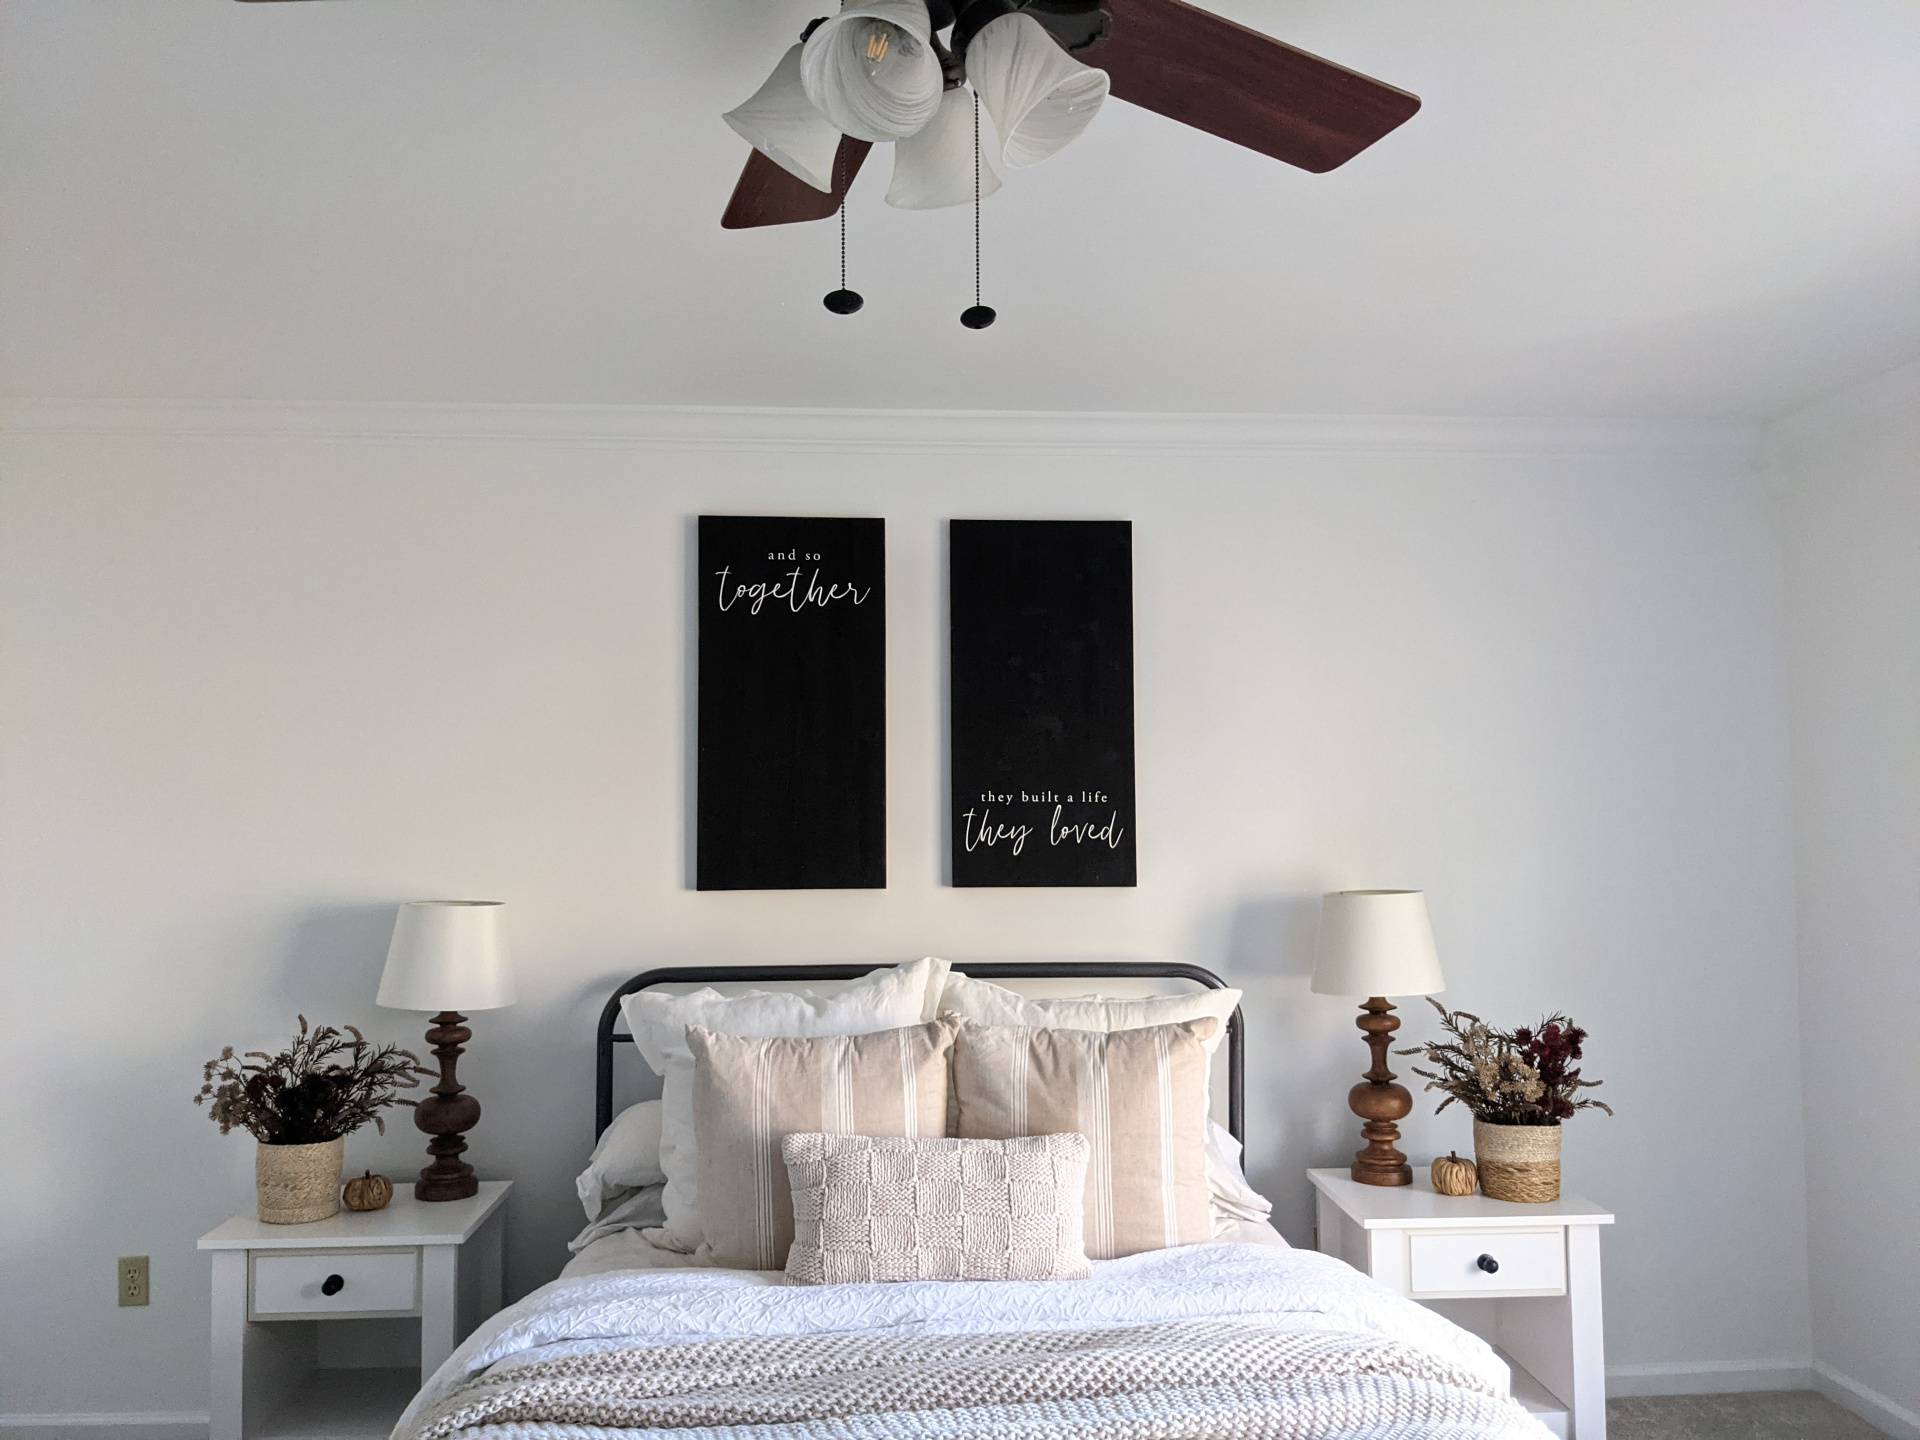
A big, pretty bland space with a wrought iron bed, some white nightstands and mixed matched furniture. And actually the way we had it set up and decorated I felt made it look way smaller than it really is.
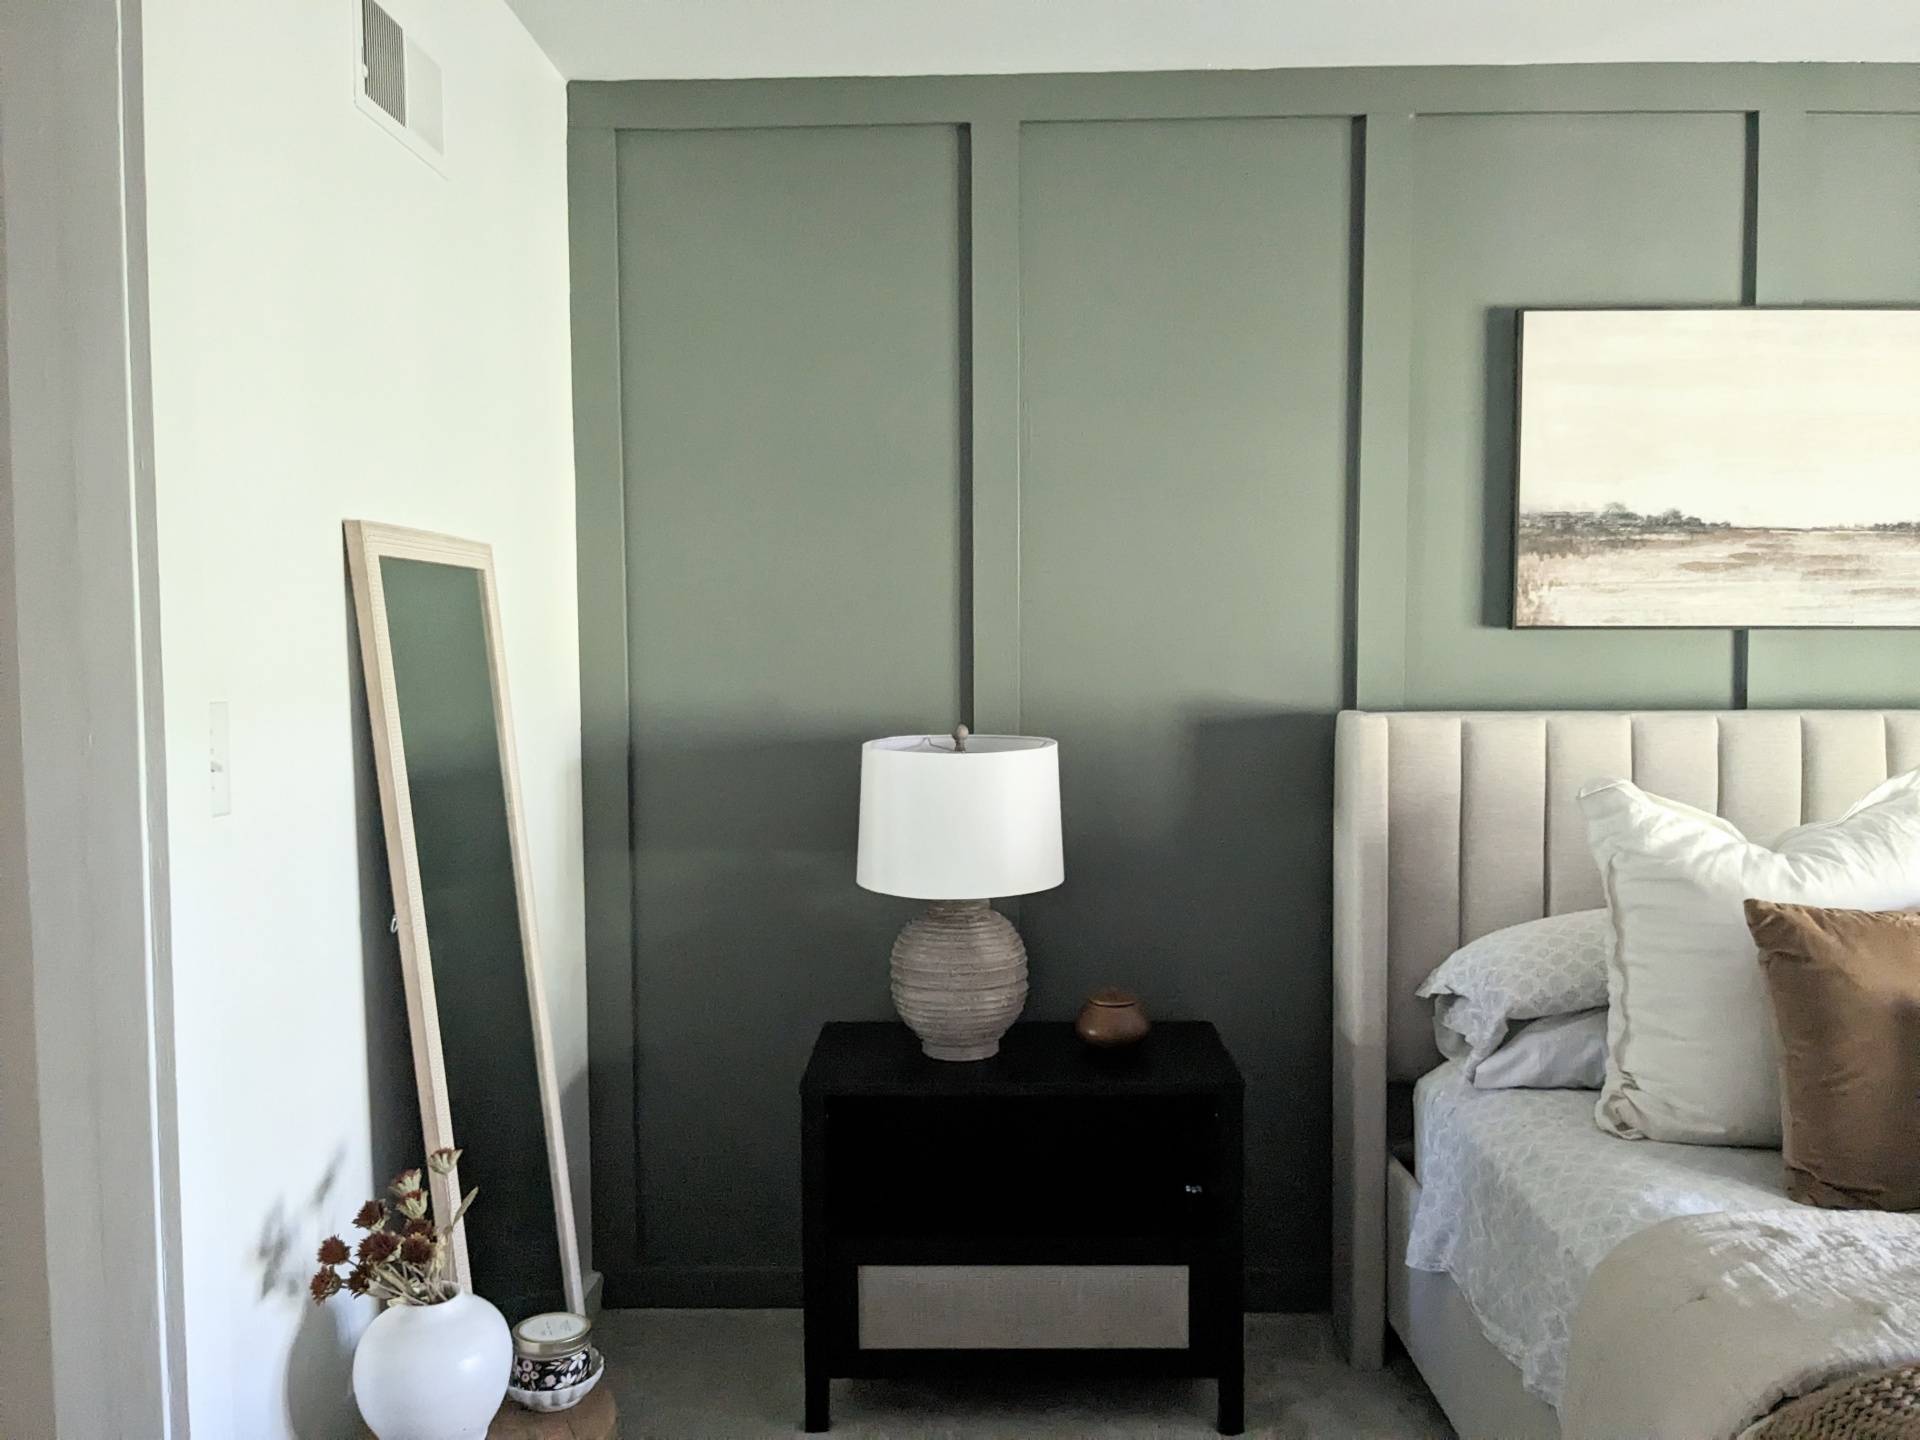
AND NOW the AFTER.......
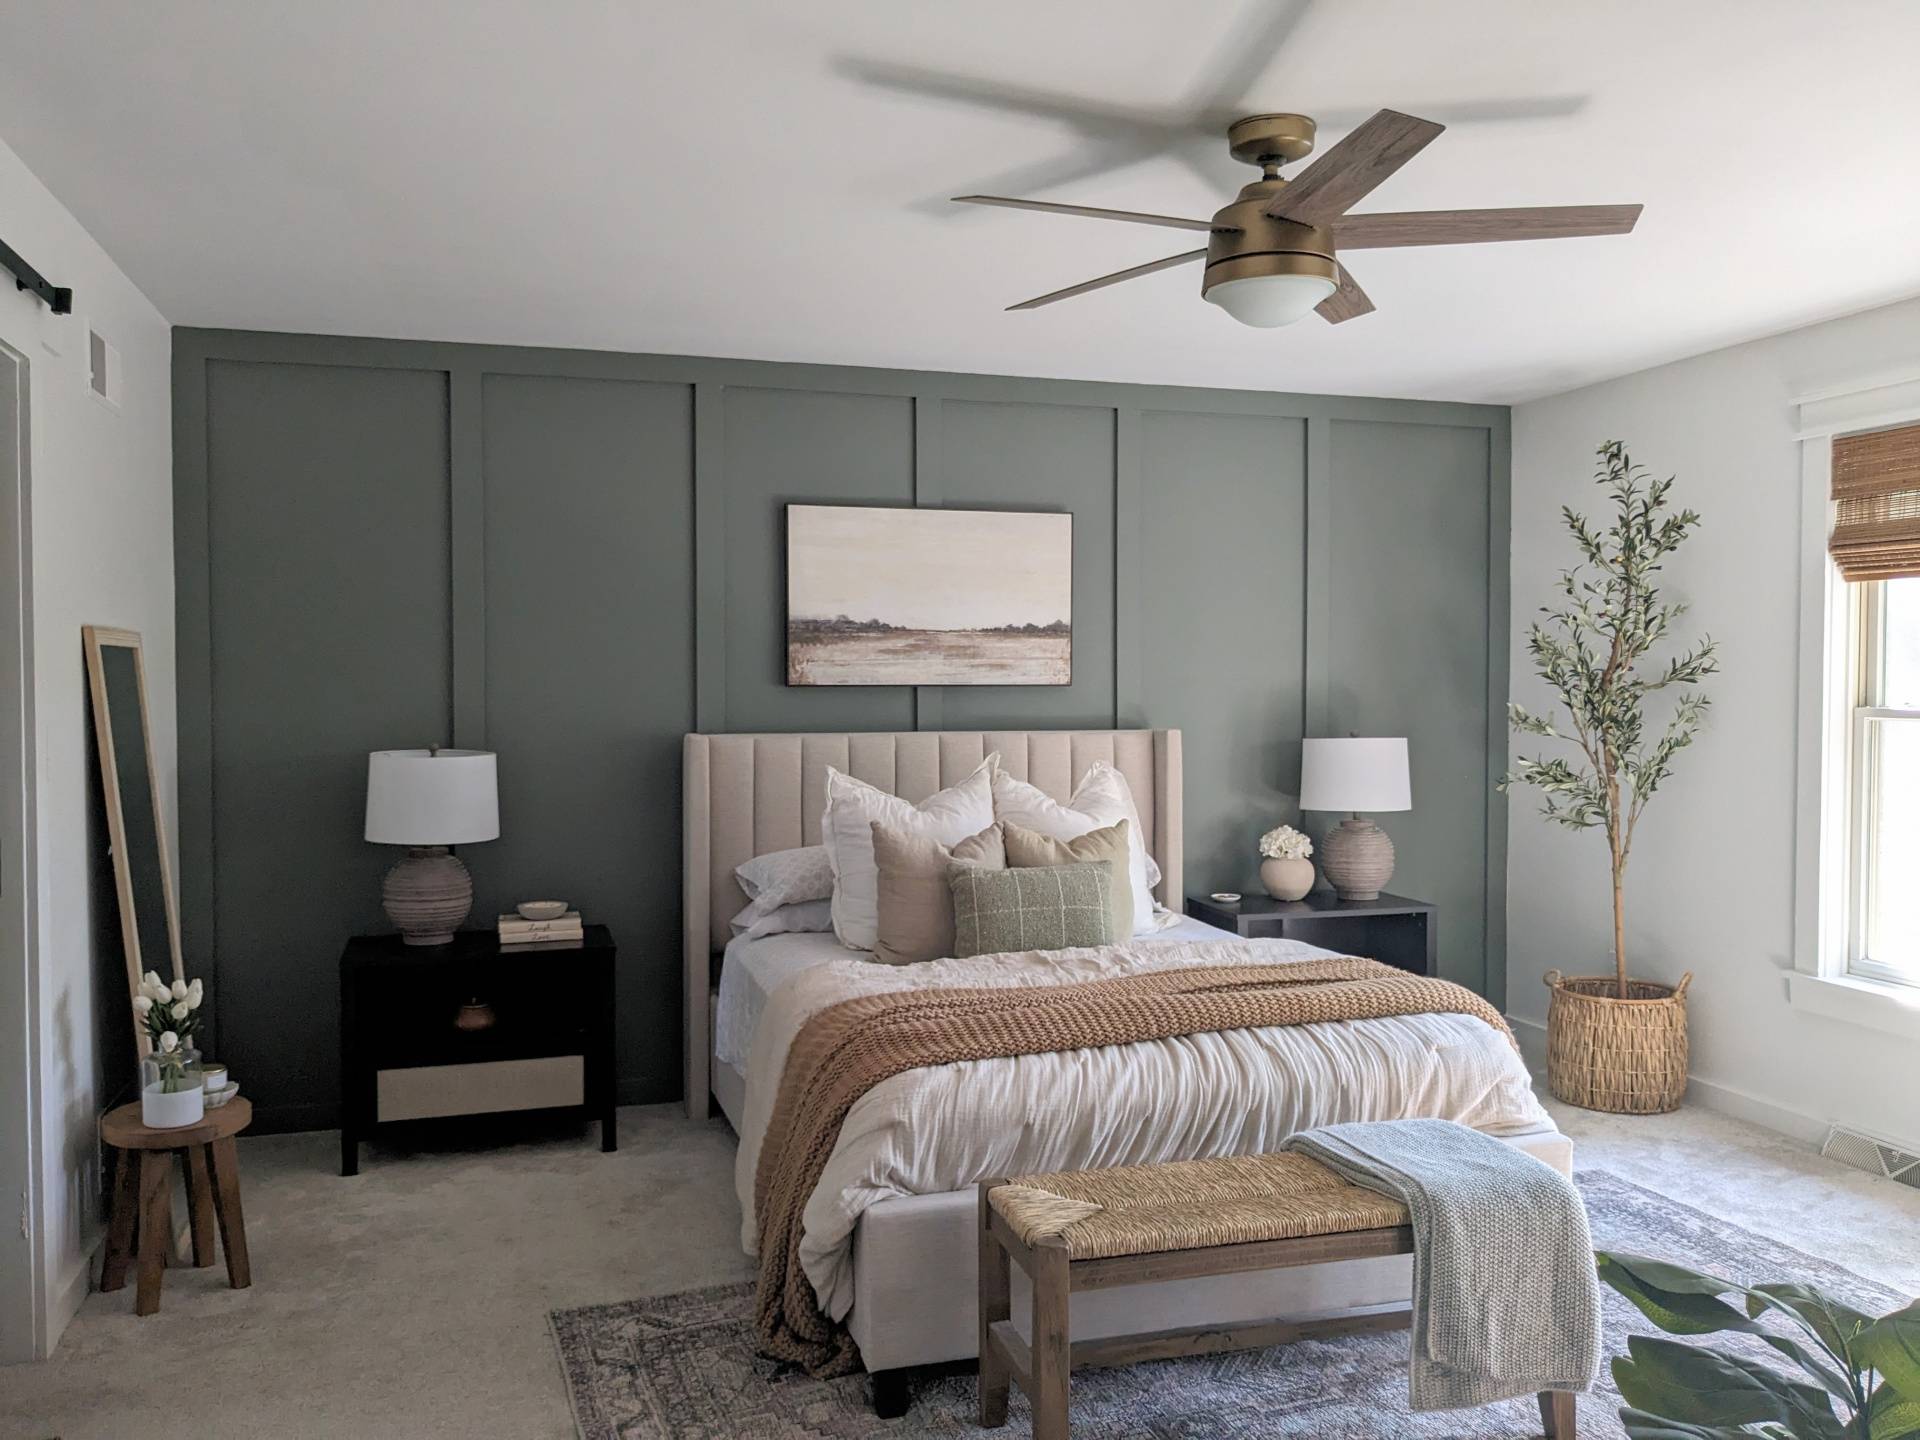
My first vision for the room was a beautiful, bold accent wall for behind the bed. We went simple and added vertical 1x4 boards. After they all were placed, we caulked, sanded and then painted in "retreat" by SW in eggshell finish.
For the space of this room, I knew a bold color would allow a good flow! Plus it adds wonderful contrast to the rest of the furniture in the bedroom. It added the dimension I was hoping for!
We also switched out our ceiling fan to this beautiful wooden and gold fan by Hunter.

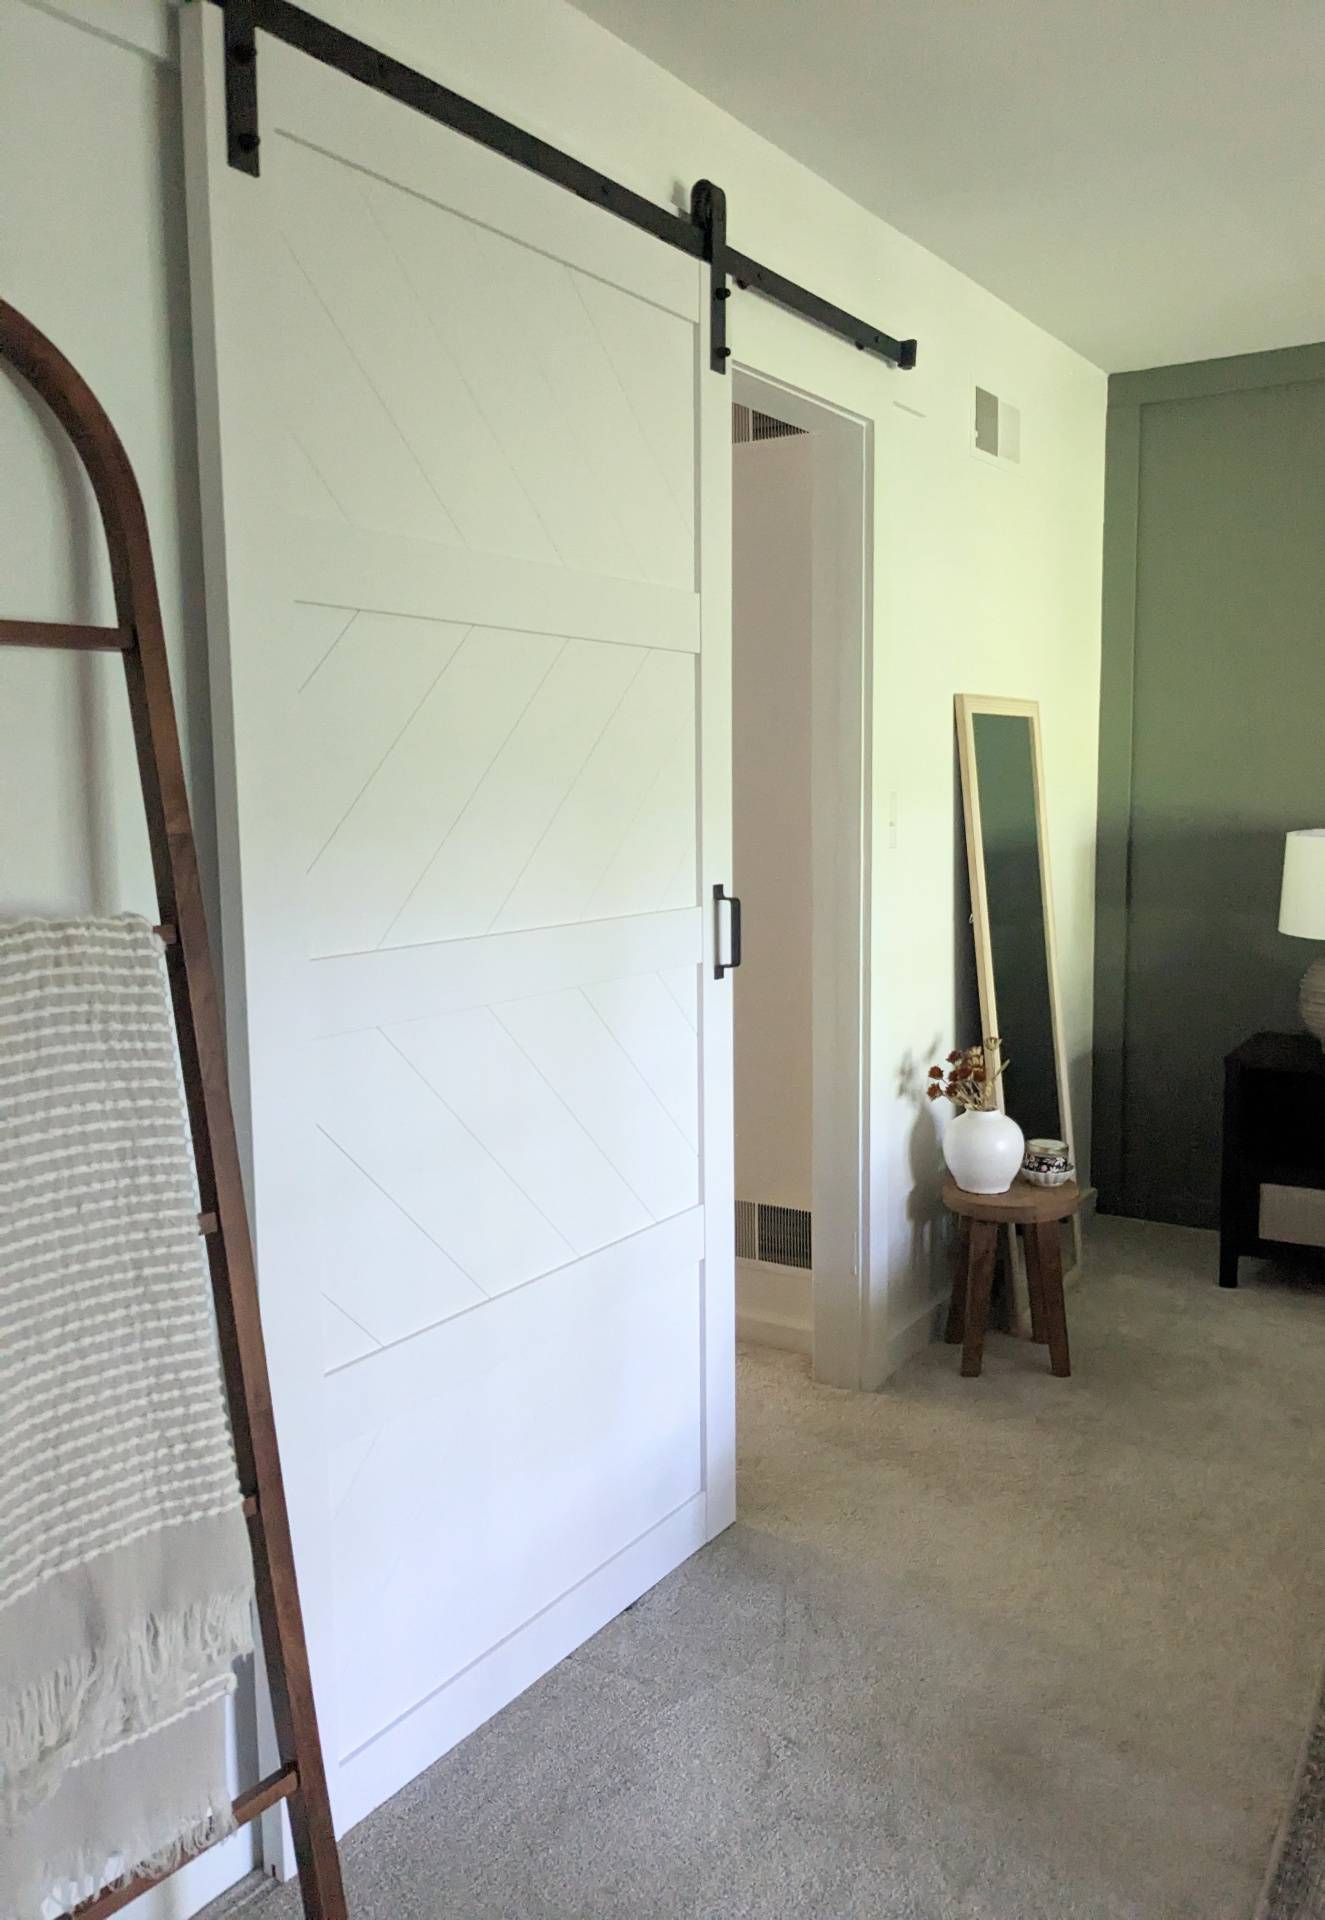
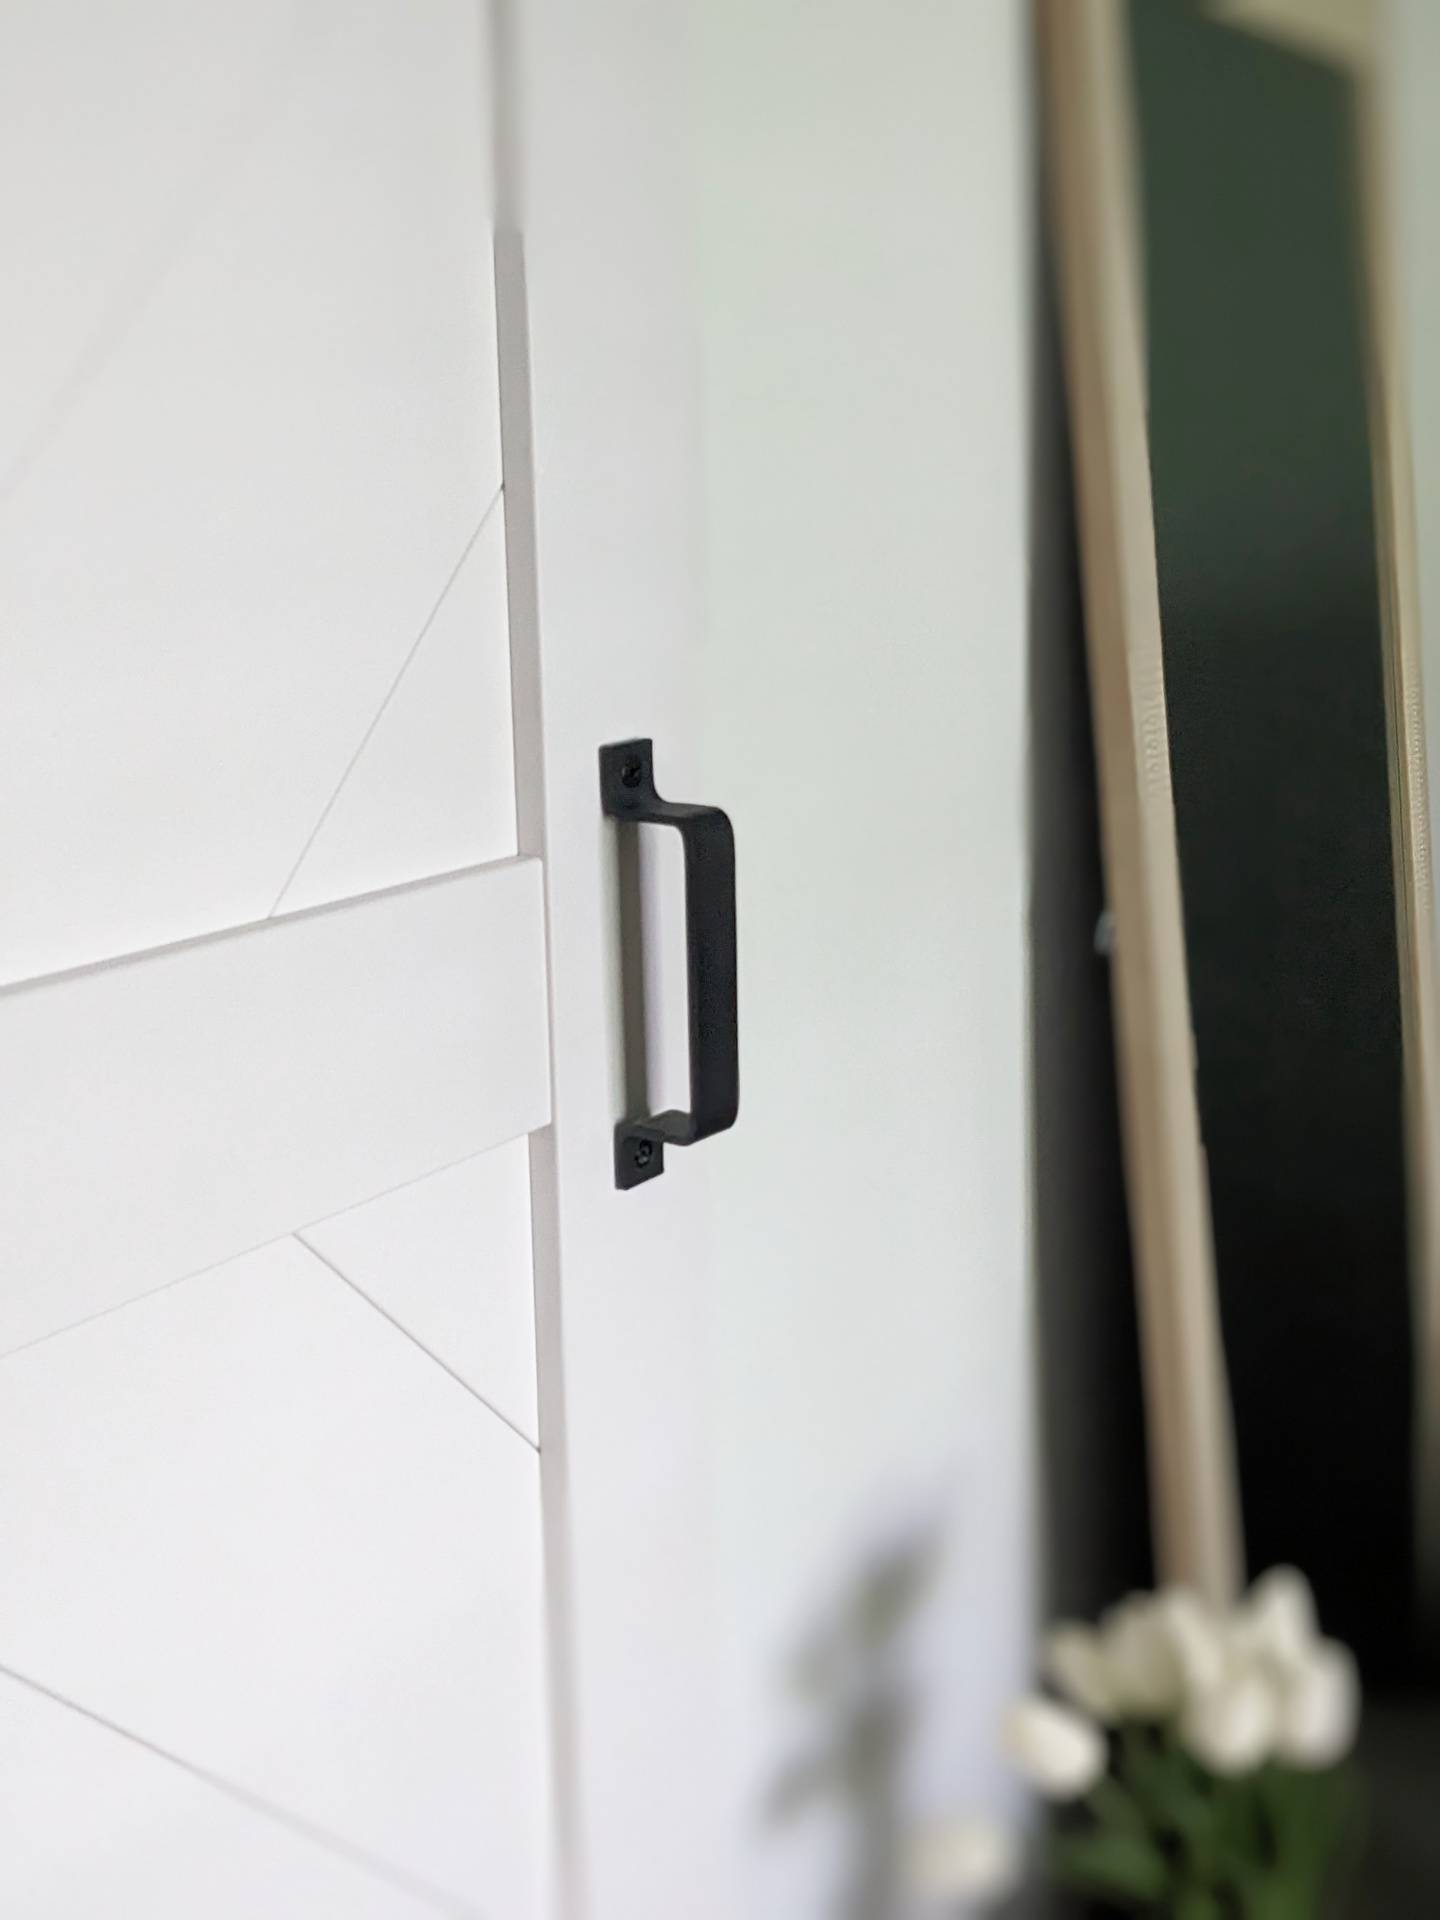
We have a master bathroom as well, but there was nothing there before that closed it off between the bedroom and bathroom. It was so hard to get ready in the bathroom in the morning without waking my husband and vis versa. It was time to change that.... By adding a barn door! We found this pretty and simple barn door and hardware kit from Wayfair for a reasonable price. Not only did it add some fun feeling character to the space but it's been serving it's purpose really well!
Now for the opposite side of the bedroom BERFORE:
Previously to the left of the big open wall held a "multi use dresser" but it didn't properly fill this space nor was it practical because of the small drawers (we brought this from our previous home) so we wanted to make use of it. In fact barely half this dresser was used because only small items could fit. We wanted to upgrade to a full size cabinet but something that wouldn't take up a lot of space. We came across this beautiful Rattan cabinet from Walmart! This cabinet has been holding up very nicely, and it's even more elegant in person!
The AFTER!
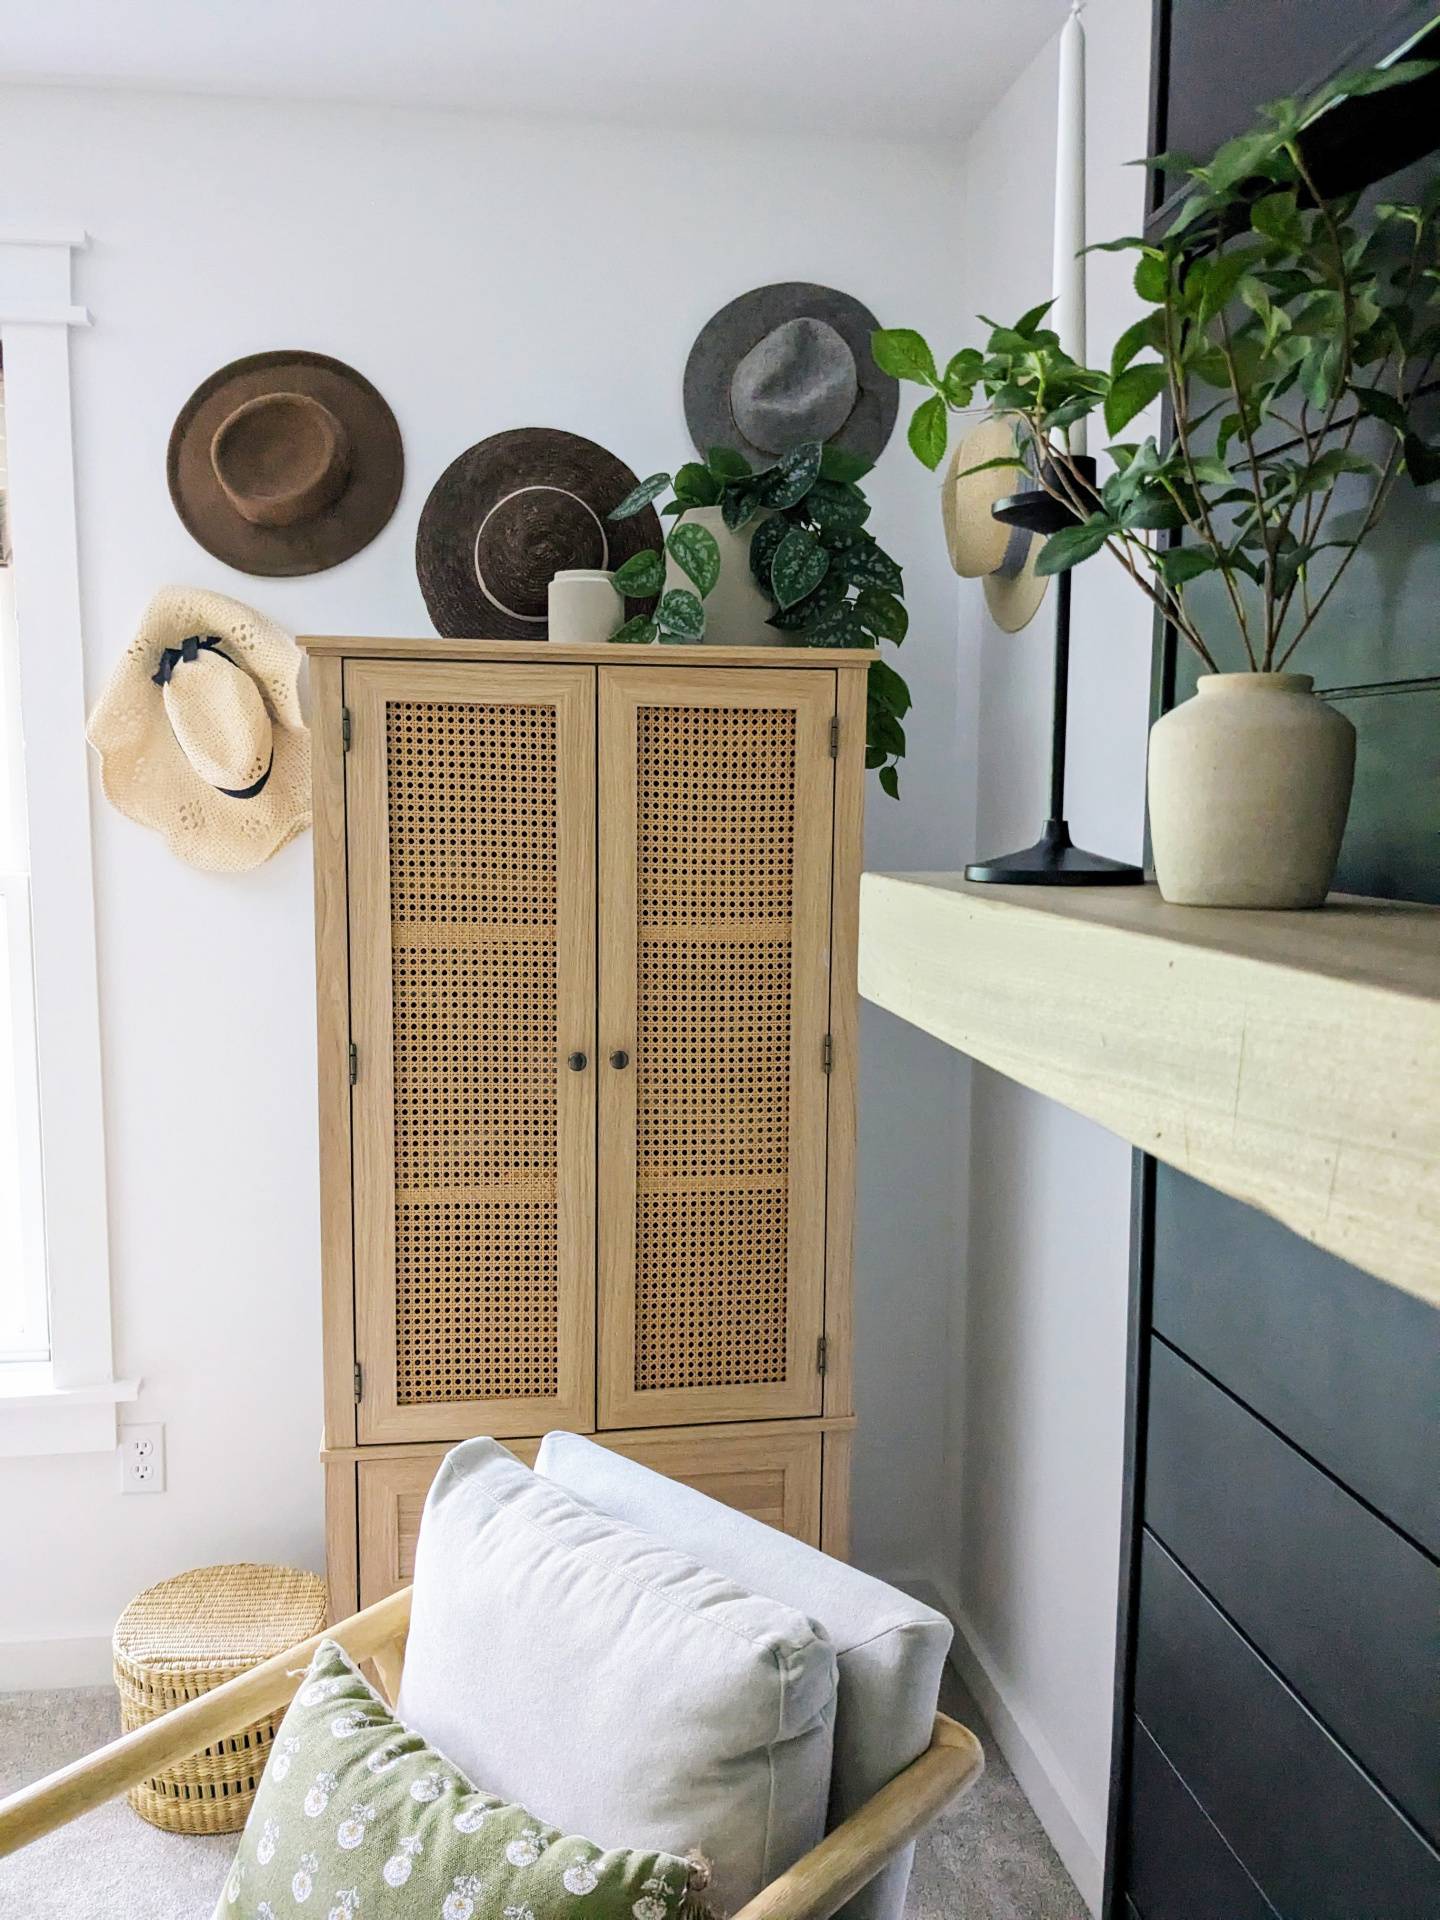
Growing up I've been so used to a dresser with slide out drawers, but we really like how we can open the doors and see each article of clothing from the front (much easier!)
The biggest DIY we added to this space was the icing on the cake!!!!!!!!!!!
Adding the electrical fireplace!
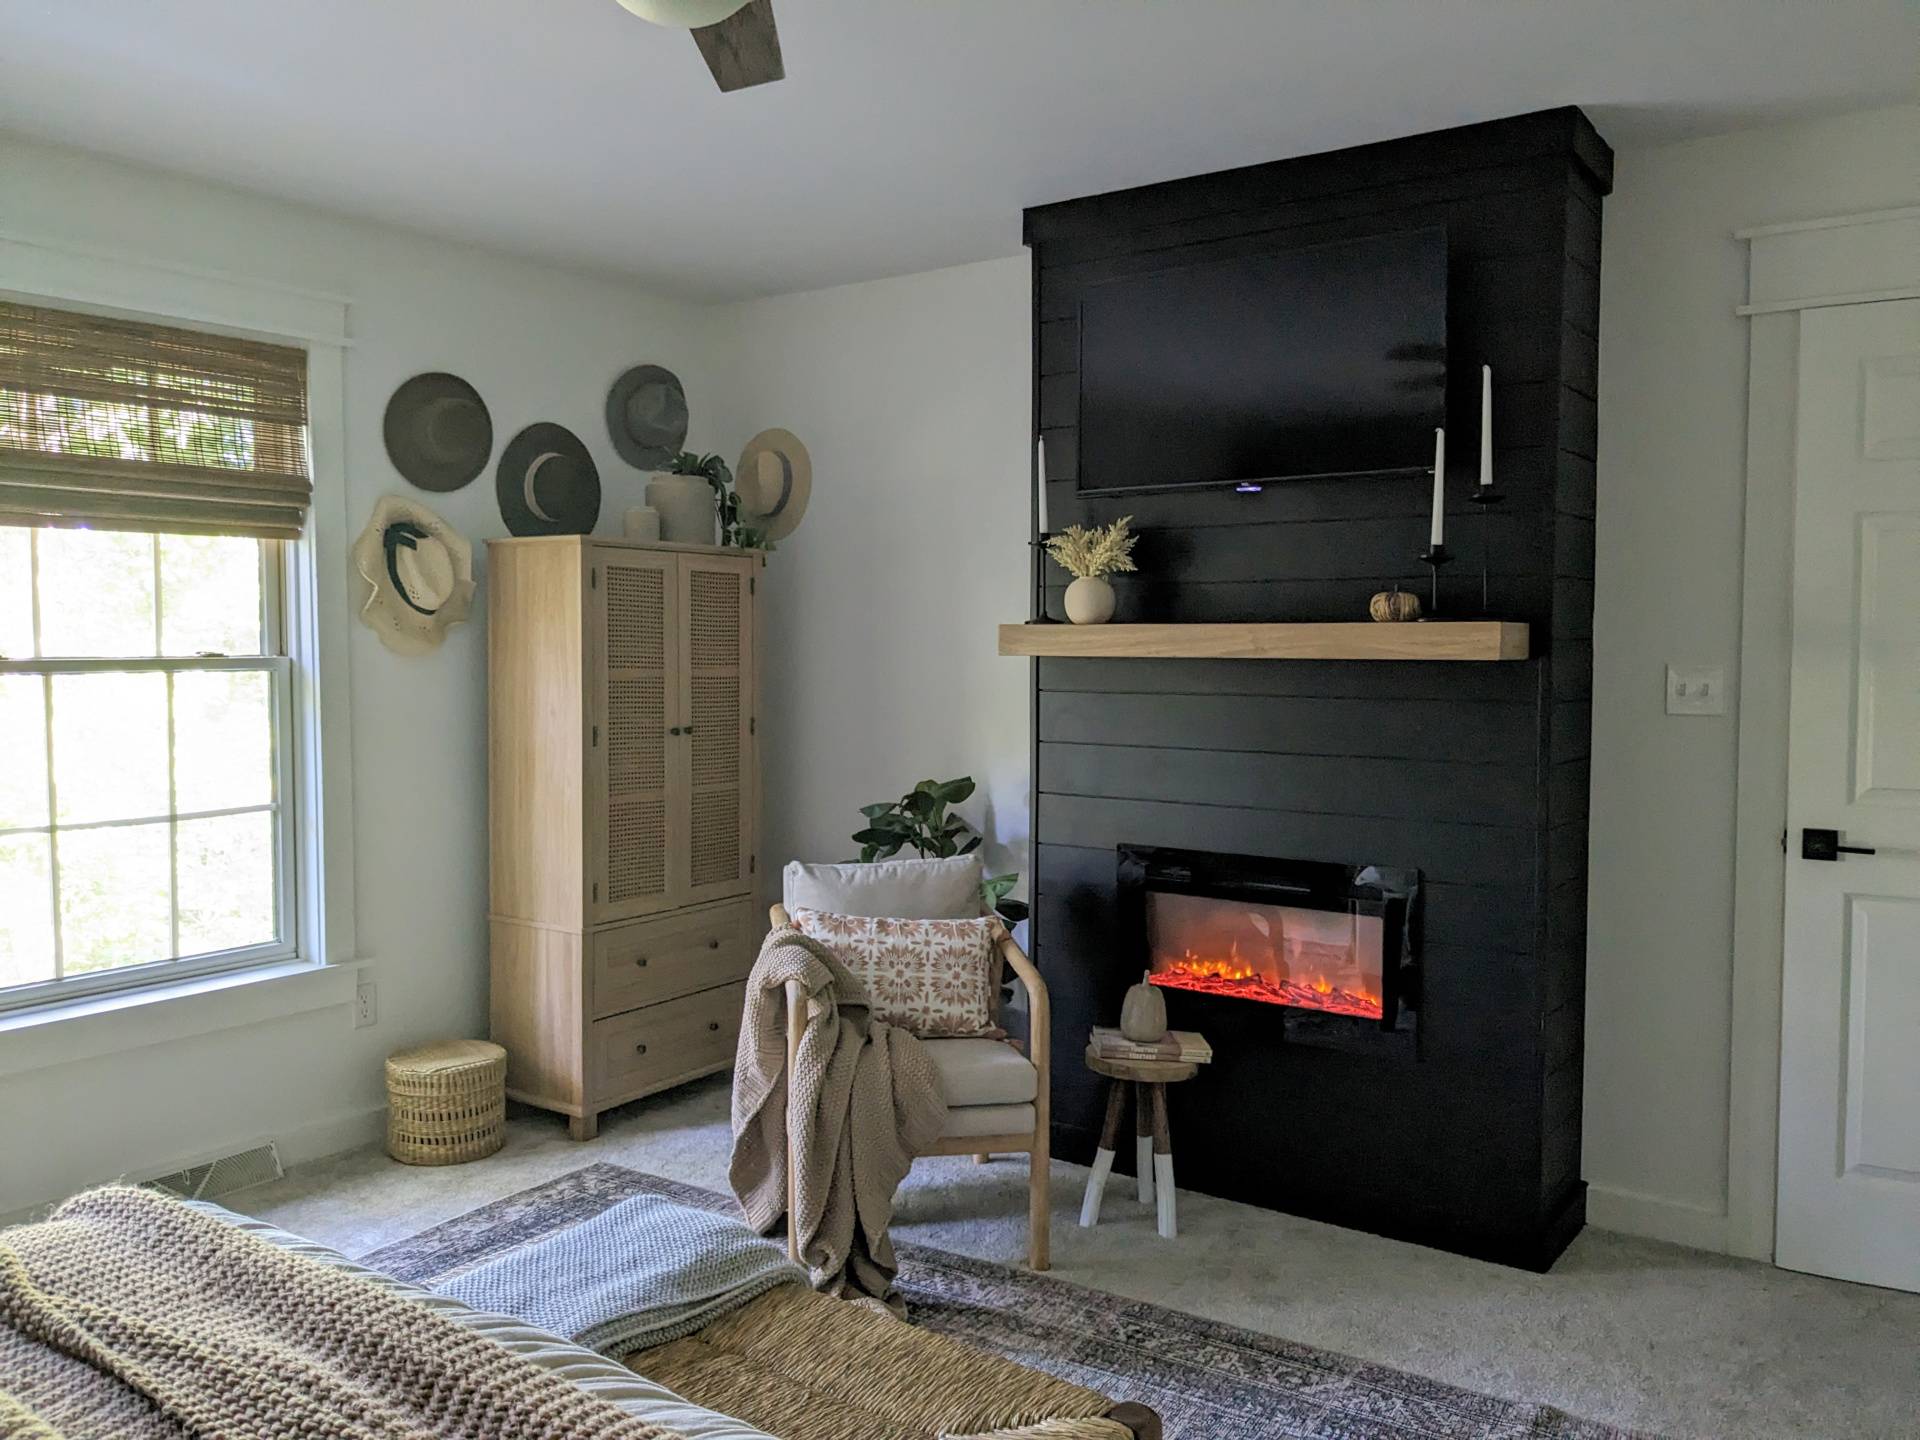
The very thing I was SO excited about was adding a DIY electrical fireplace! The big open wall was calling for one. All that to say we looked up some inspo on pinterest, and got right to work. It was super simple to do and it instantly changed the vibe and esthetic of the whole room.
We simply framed out the fireplace with 2x4's along with frame for the fireplace insert, attached the framing and then placed shiplap right overtop. Here is the link to the blogger in which we followed to create her diy fireplace addition. After some wood filler applied to air nailer holes, we sanded and then painted in Tricorn Black by SW in eggshell finish. Popping against the fireplace is a beautiful floating shelf made by TimberMade Co, a local company that creates amazing pieces by hand.
If you payed close attention we also added new shades to the windows, which we love!! (We also added these to our living room windows as well) They are simple, and don't totally block the sunlight, which is what we were wanting. We also did a small DIY to the windows..... Adding grids! All you need are some scissors, and white electrical tape, and you have grid windows!!! Super easy and the tape lasts a long time. If your asking yourself, "will the residue from the tape ruin the windows?" The answer is no, we actually did the windows on the main level of our home about 6-8 months ago, and just redid all of them to match up with the new windows and it was super easy to remove with some Windex and a towel.
Links to d�cor
- Accent chair
- Side table
- Ceramic vases (here is something similar linked)
- Nightstand ceramic vase
- Faux hydrangea stem
- Candlesticks
- Faux greenery (on shelf)
- Lumbar pillow (out of stock -The Studio McGee line has an amazing selection of pillows)
- Candle
- Lamps
- Faux olive tree (by far my fav faux olive tree!!!)
- Area rug
- Framed wall art (here is a link to a huge selection of prints similar to what we have)
We couldn't be any more happier with how this room turned out! Every time I walk in, I just get a giddy feeling because it turned out exactly how I had envisioned! It's practical, pretty and super cozy. We are especially looking forward to some cozy nights with the fireplace turned on.
I hope you enjoyed reading this as much as I had fun writing about it to share with you! I was really excited to send this one out for you!!
Posted: 05/20/2023