Front Entry Beadboard DIY
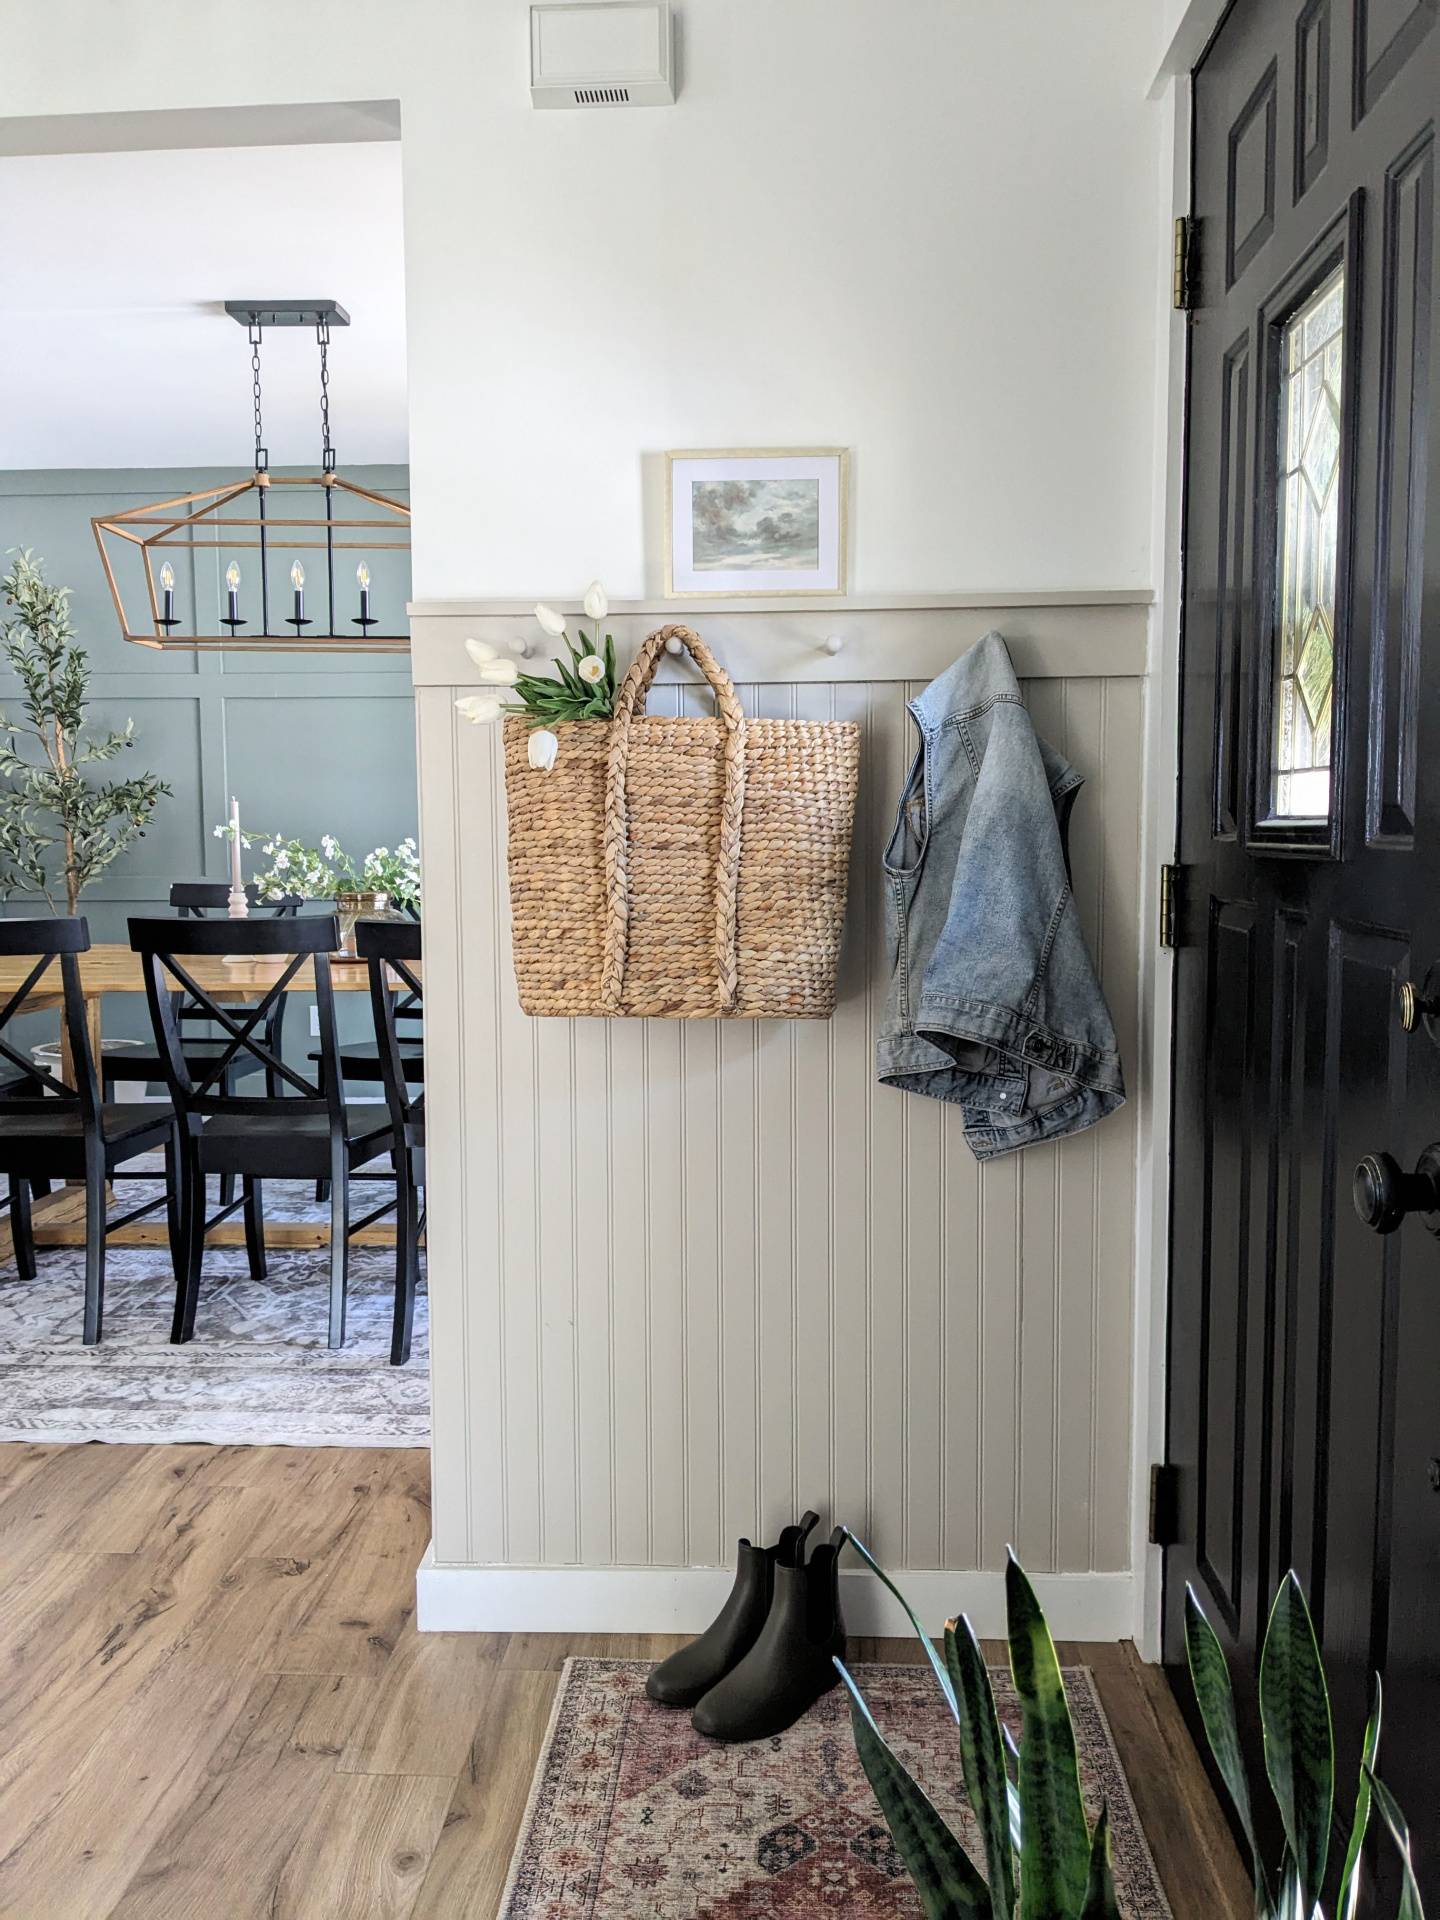
Today I am sharing on the beadboard in our entry! We still cannot believe how much of a difference a little bit of beadboard and paint did! It adds so much character, and warmth. If you've been tossing the idea back and forth of adding beadboard, I hope this will give you the urge to do it! Guys, we love it so much, we are for sure adding it in other parts of our home!
Let me start saying, it is one of the easiest DIY's out there! Any skill level of a person can do this, and it's super cost effective to bring a dramatic transformation. You can buy these in big sheets at home depot, or have them cut it down to size! I actually found these free, yes I said free! It came from beadboard listed on FB marketplace local. They were all different sizes but I knew we could put them to use.
Here is what you will need:
- Molding/Trim for top of beadboard
- Trim for sides as necessary for wall we chose, yours may not need this
- Level
- Jigsaw
- Table saw
- Hammer and finishing nails or nail gun
- Caulk and gun
- Wood fill, sanding block
- Accessible grey- by SW in satin/ Extra white by SW in semi-gloss for trim
- Paint brush
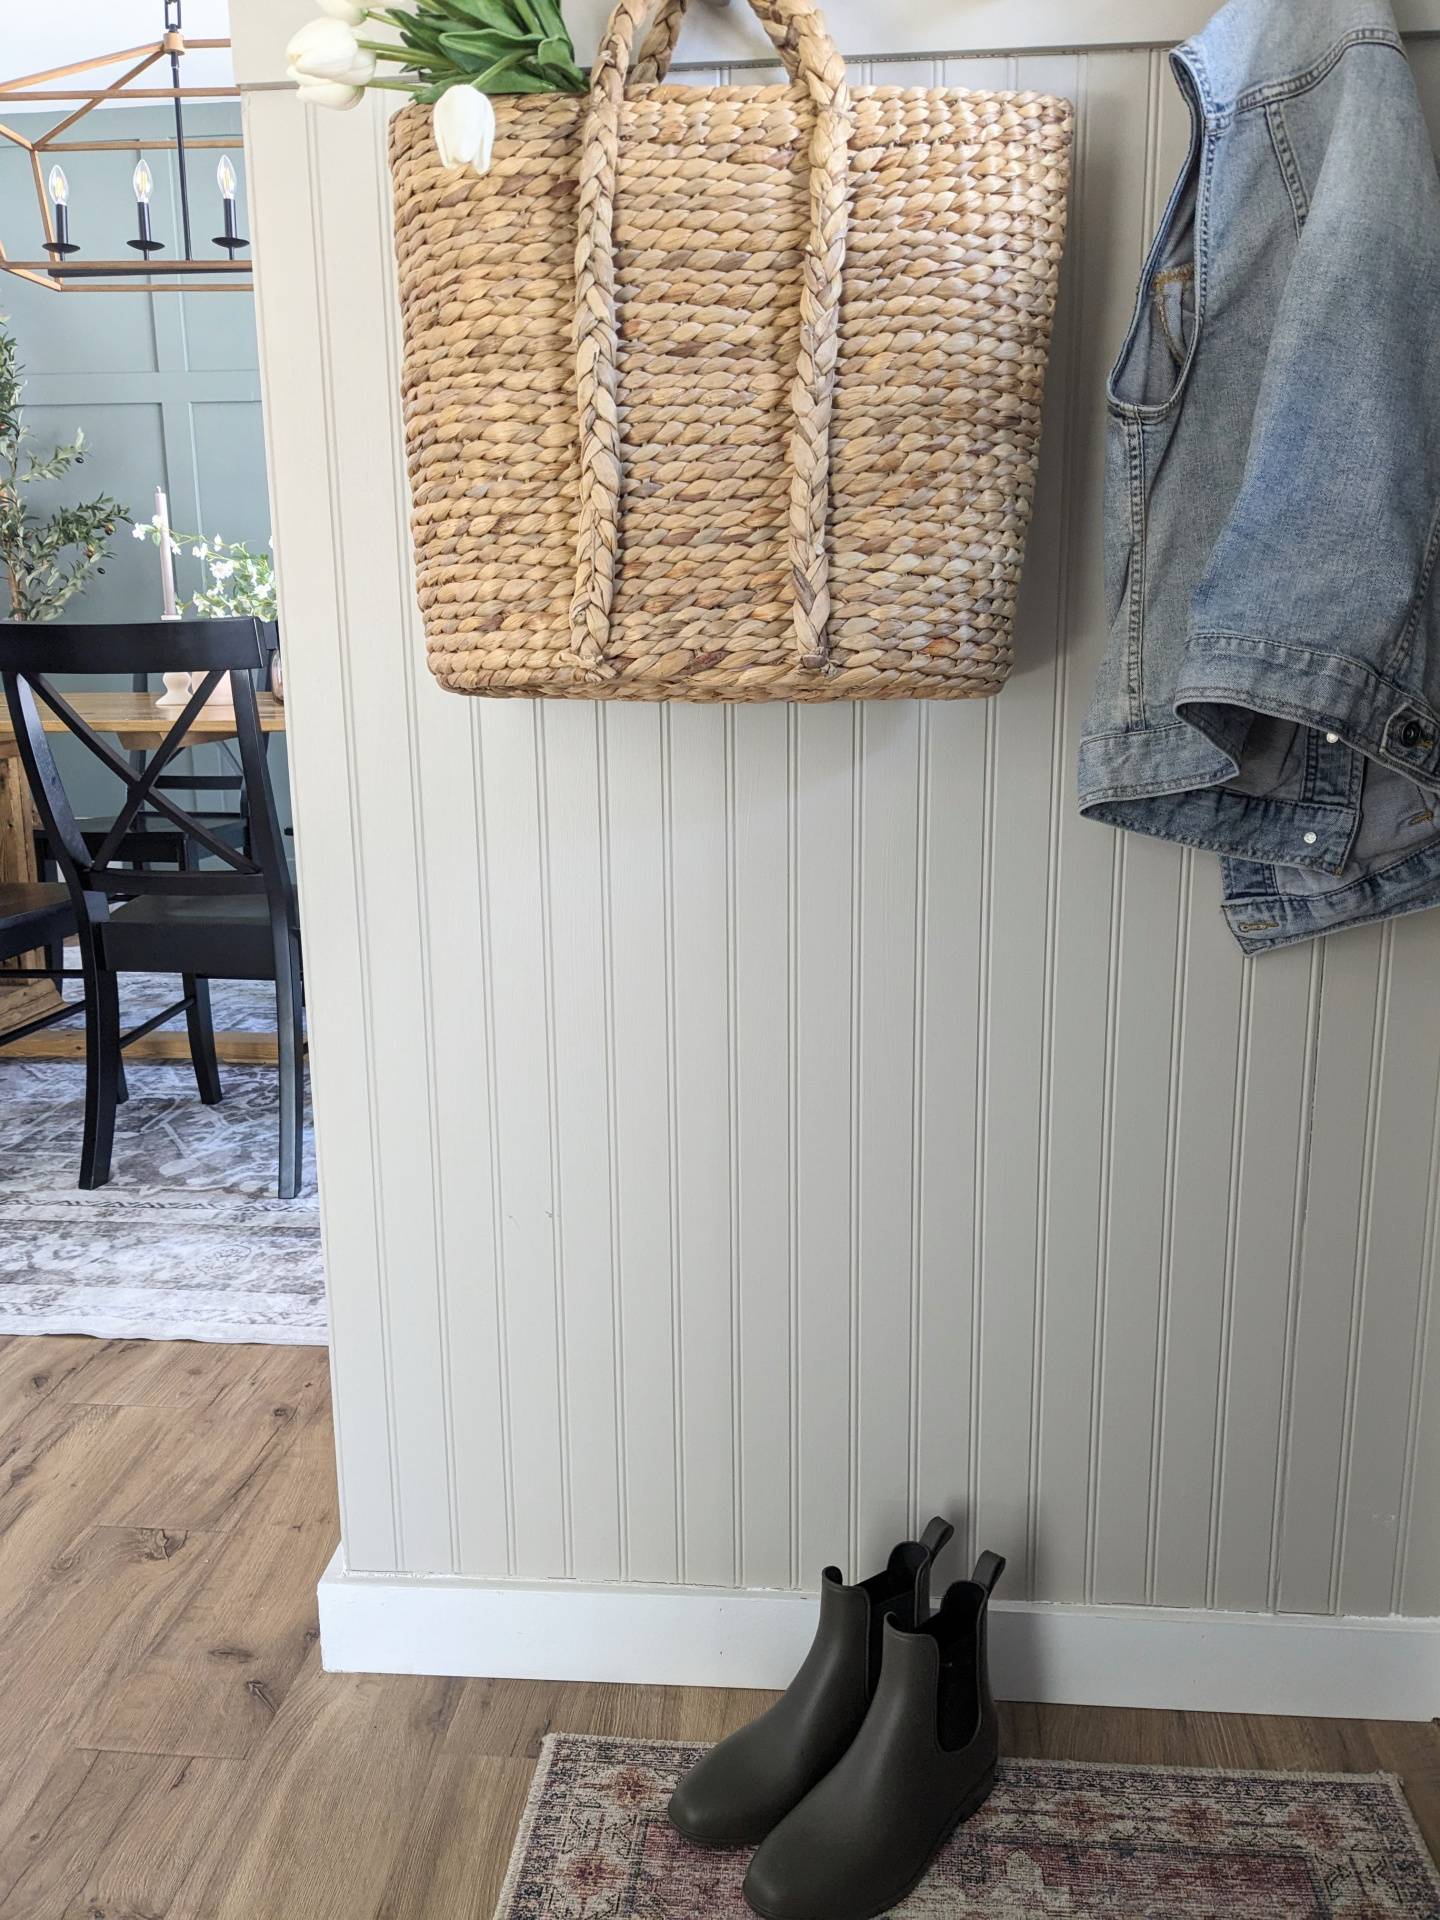
- Wooden shaker pegs + Wood glue
How we did it:
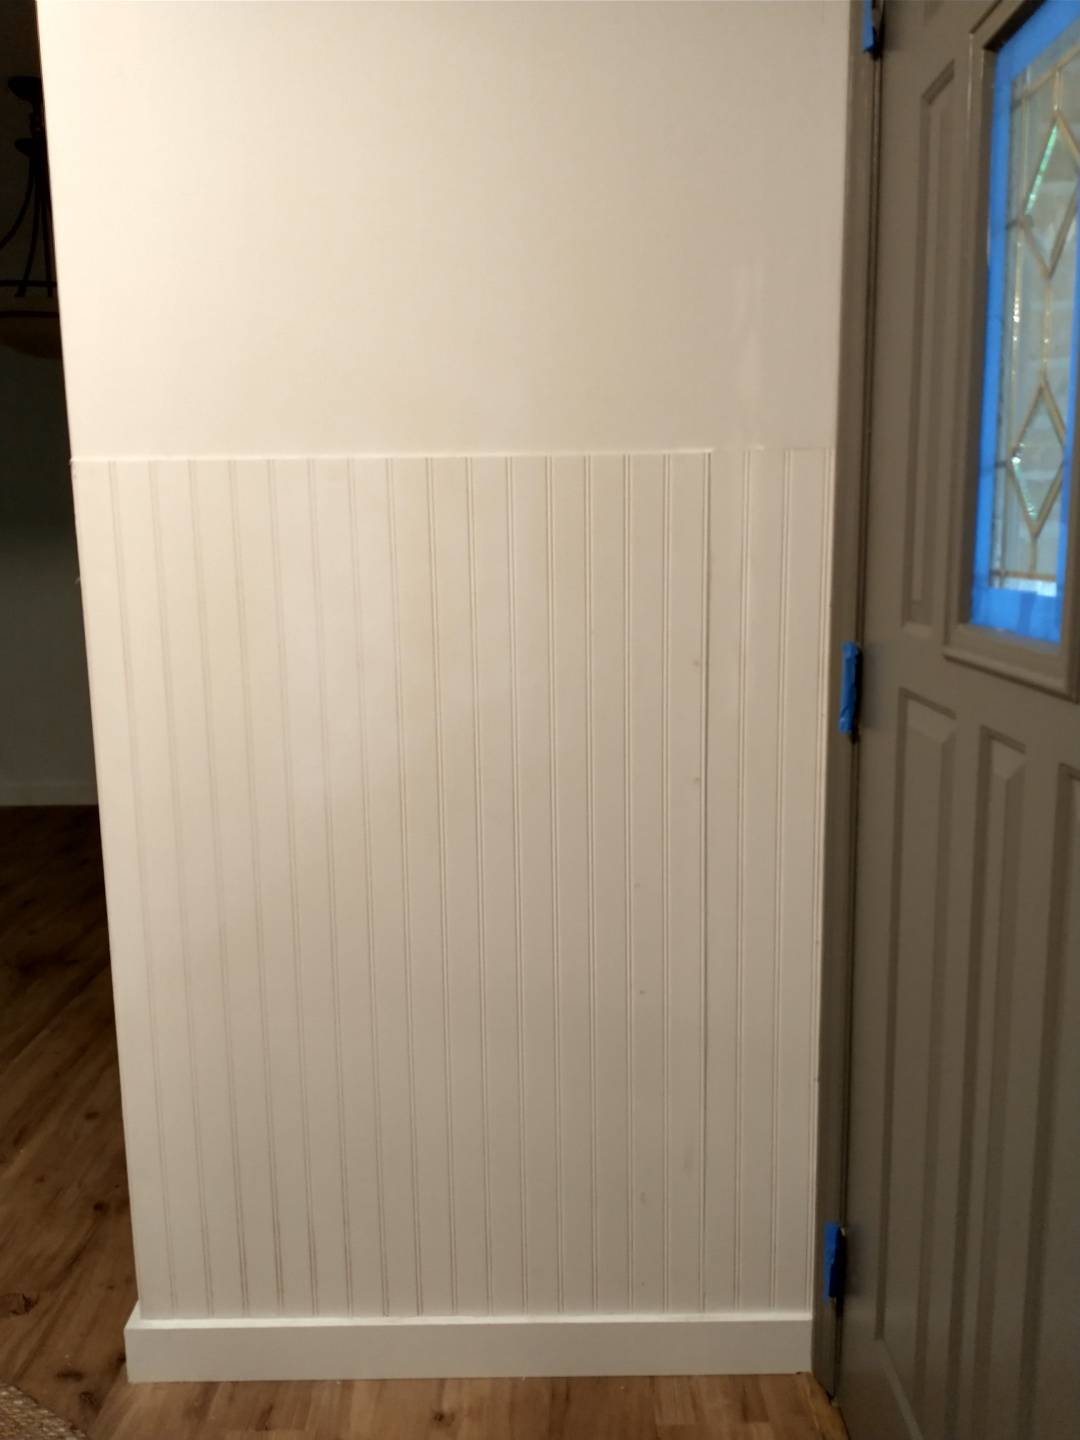
1) Decide on height for beadboard to meet at door.
2) Measure and cut beadboard to size.

3) Sand all edges for smooth and flat fitting against wall/trim, then nail to wall.
4) Measure and cut 1x4 trim to size.
5) Sand, and air nail trim to place above beadboard.
6) Measure according for even placement of shaker pegs, drill hole and glue in place.

7) Painted beadboard Accessible Grey by SW and Trim Extra White by SW.
8) Decorate!!!
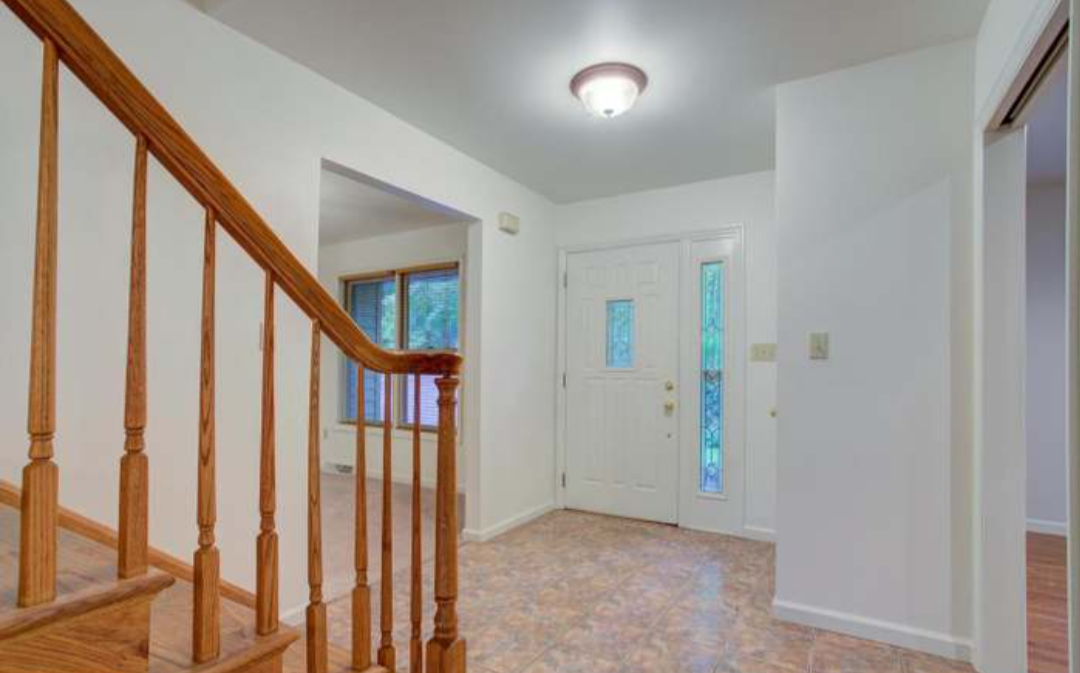
BEFORE
AFTER
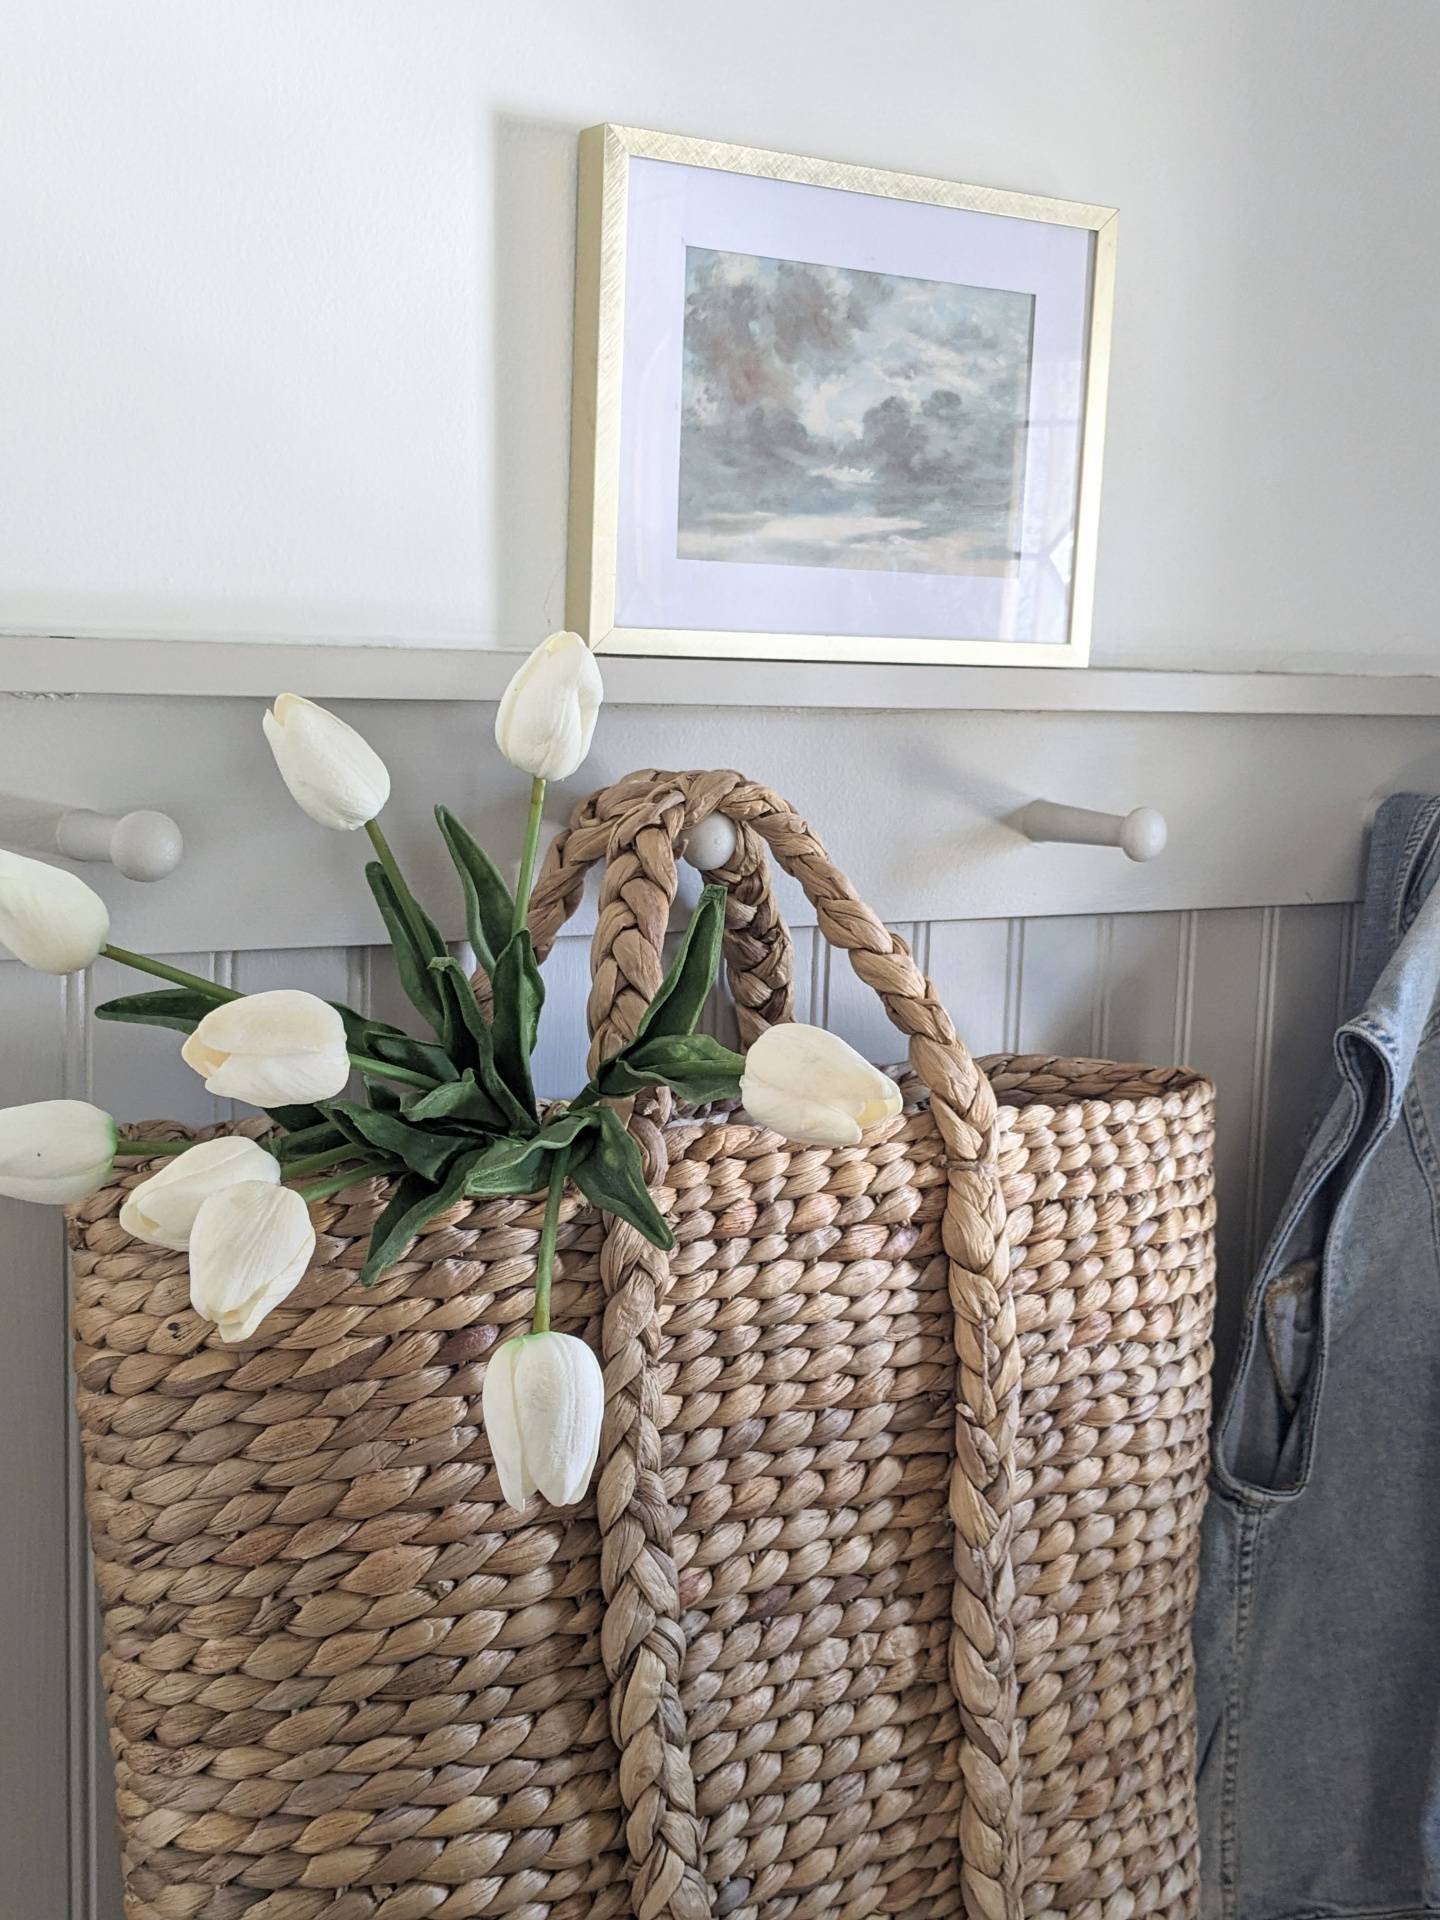
This house is starting to feel more and more like home as we slowly complete more DIY projects!
Since we have completed this project, we also added a fun closet nook across from the beadboard for more practical use. See the blog here!
Thanks for reading friends!!!
Posted: 09/11/2021

-400x400.jpg?_t=1701554384)